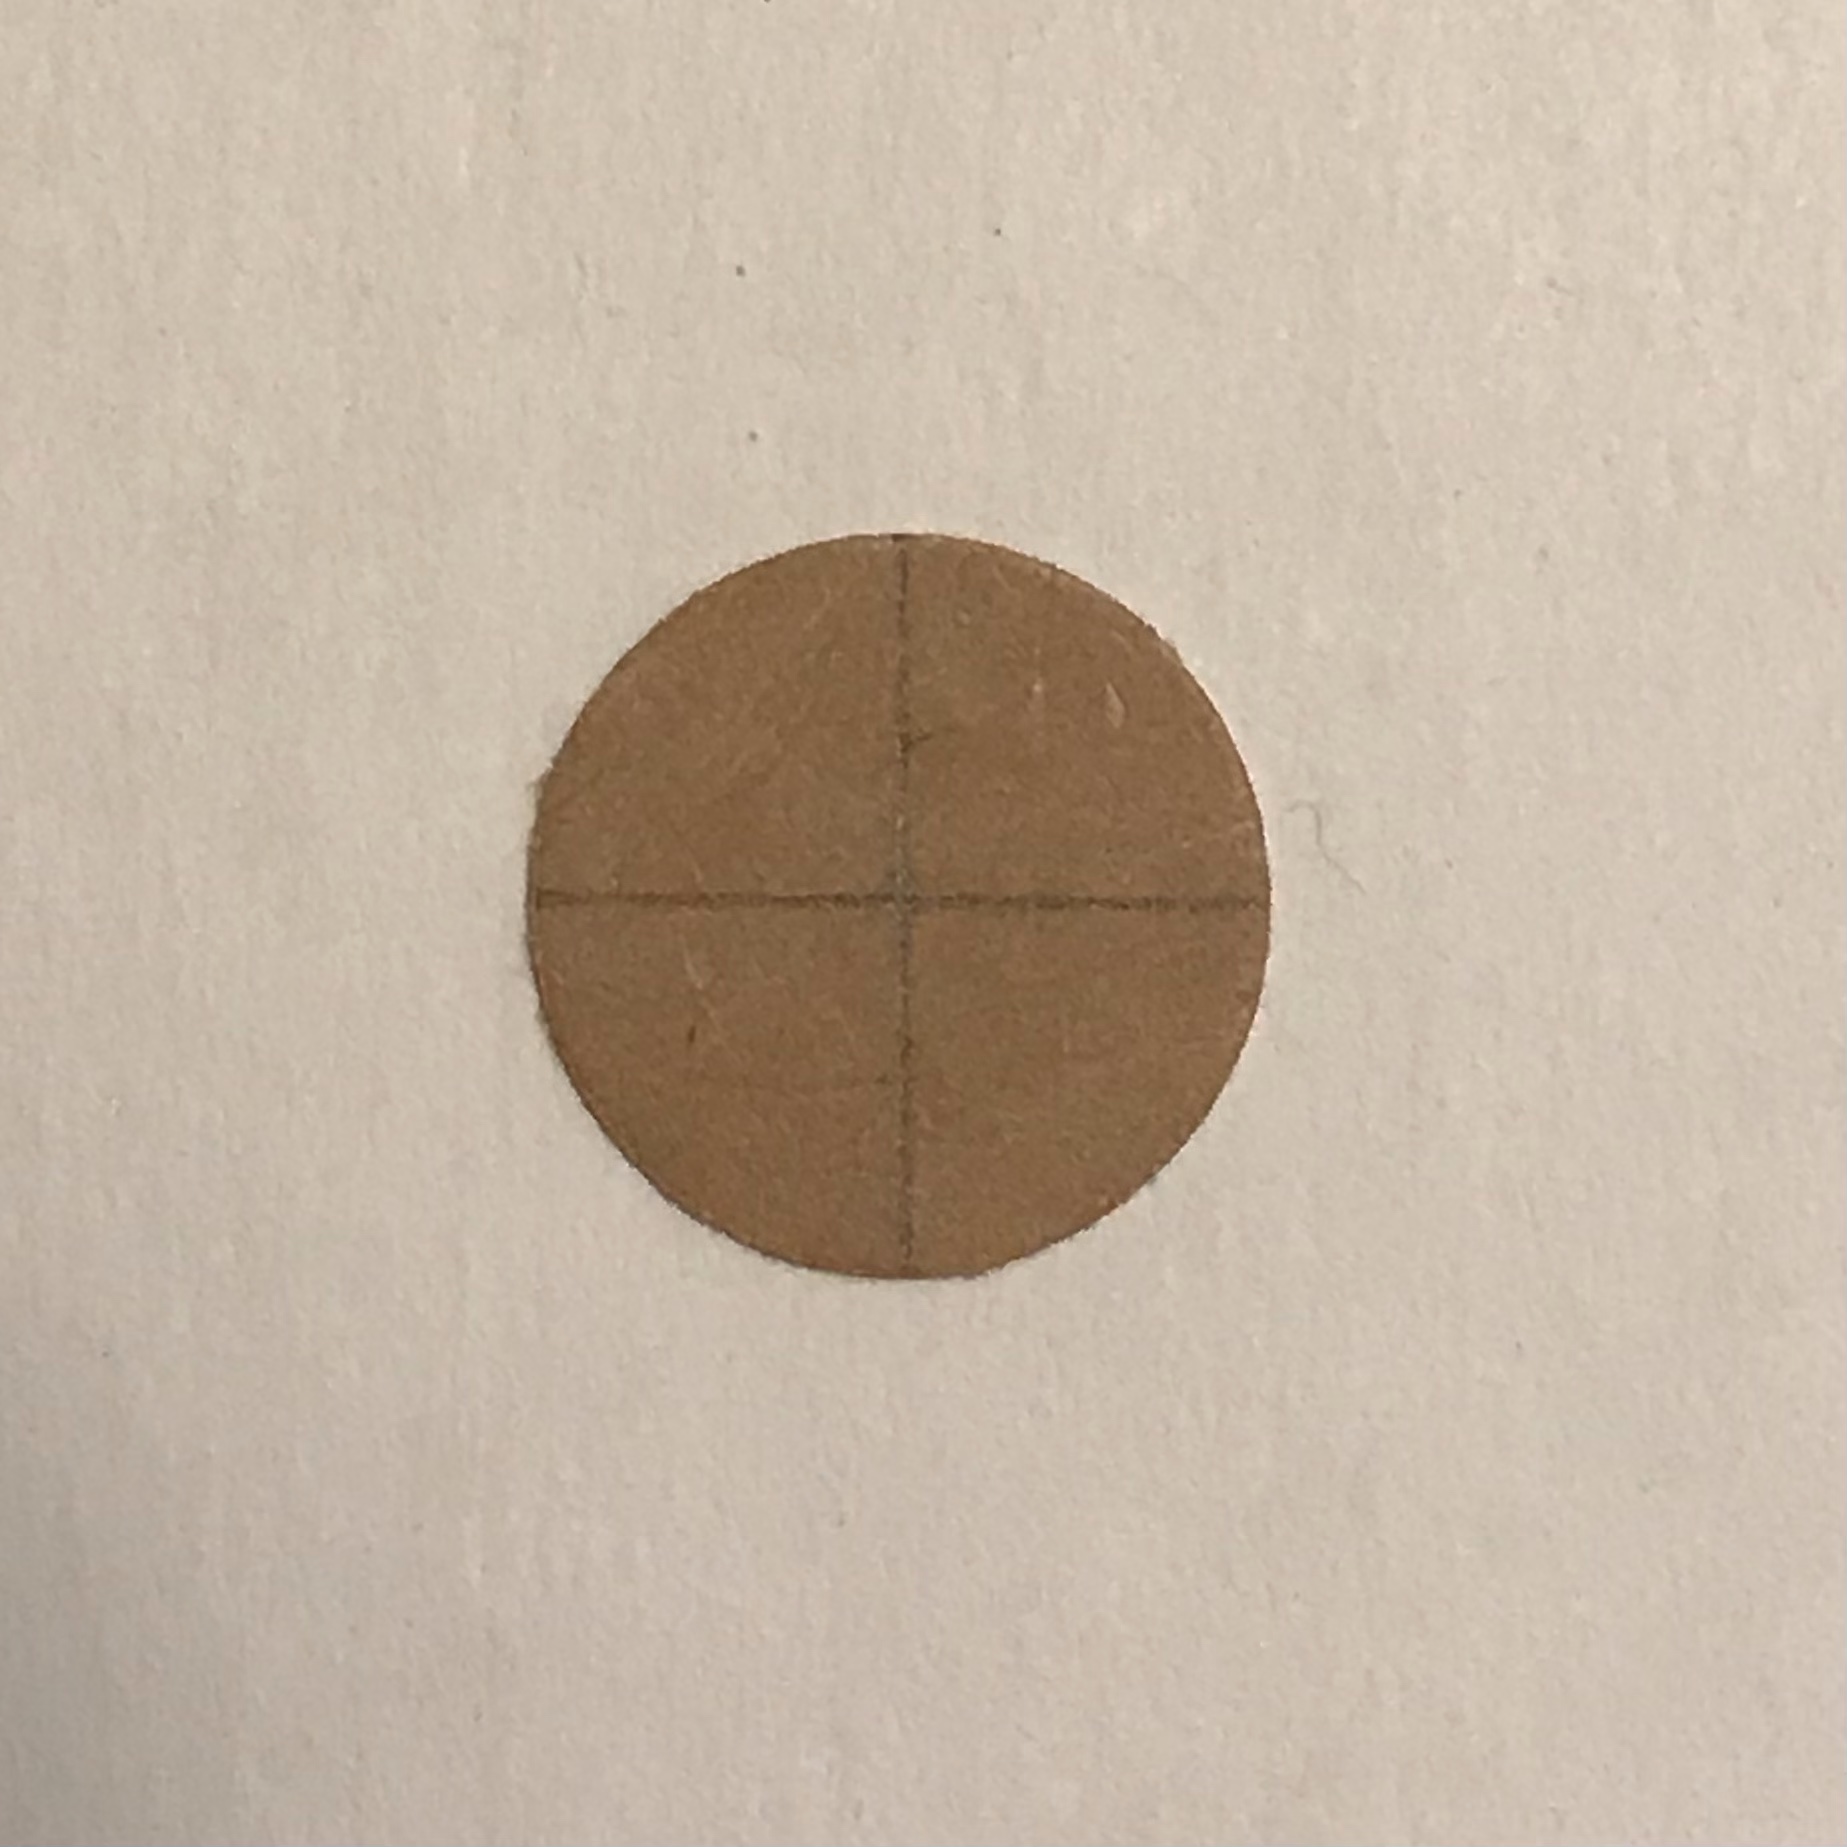
2. Put glue on your paper disc and place your petals uniformly around the center.
Hint: Draw lines on your disc so you know where to place your petals.
3. Reshape the flower before the glue dries.
Because they may move around in the wet glue.
4. Let the glue dry completely.
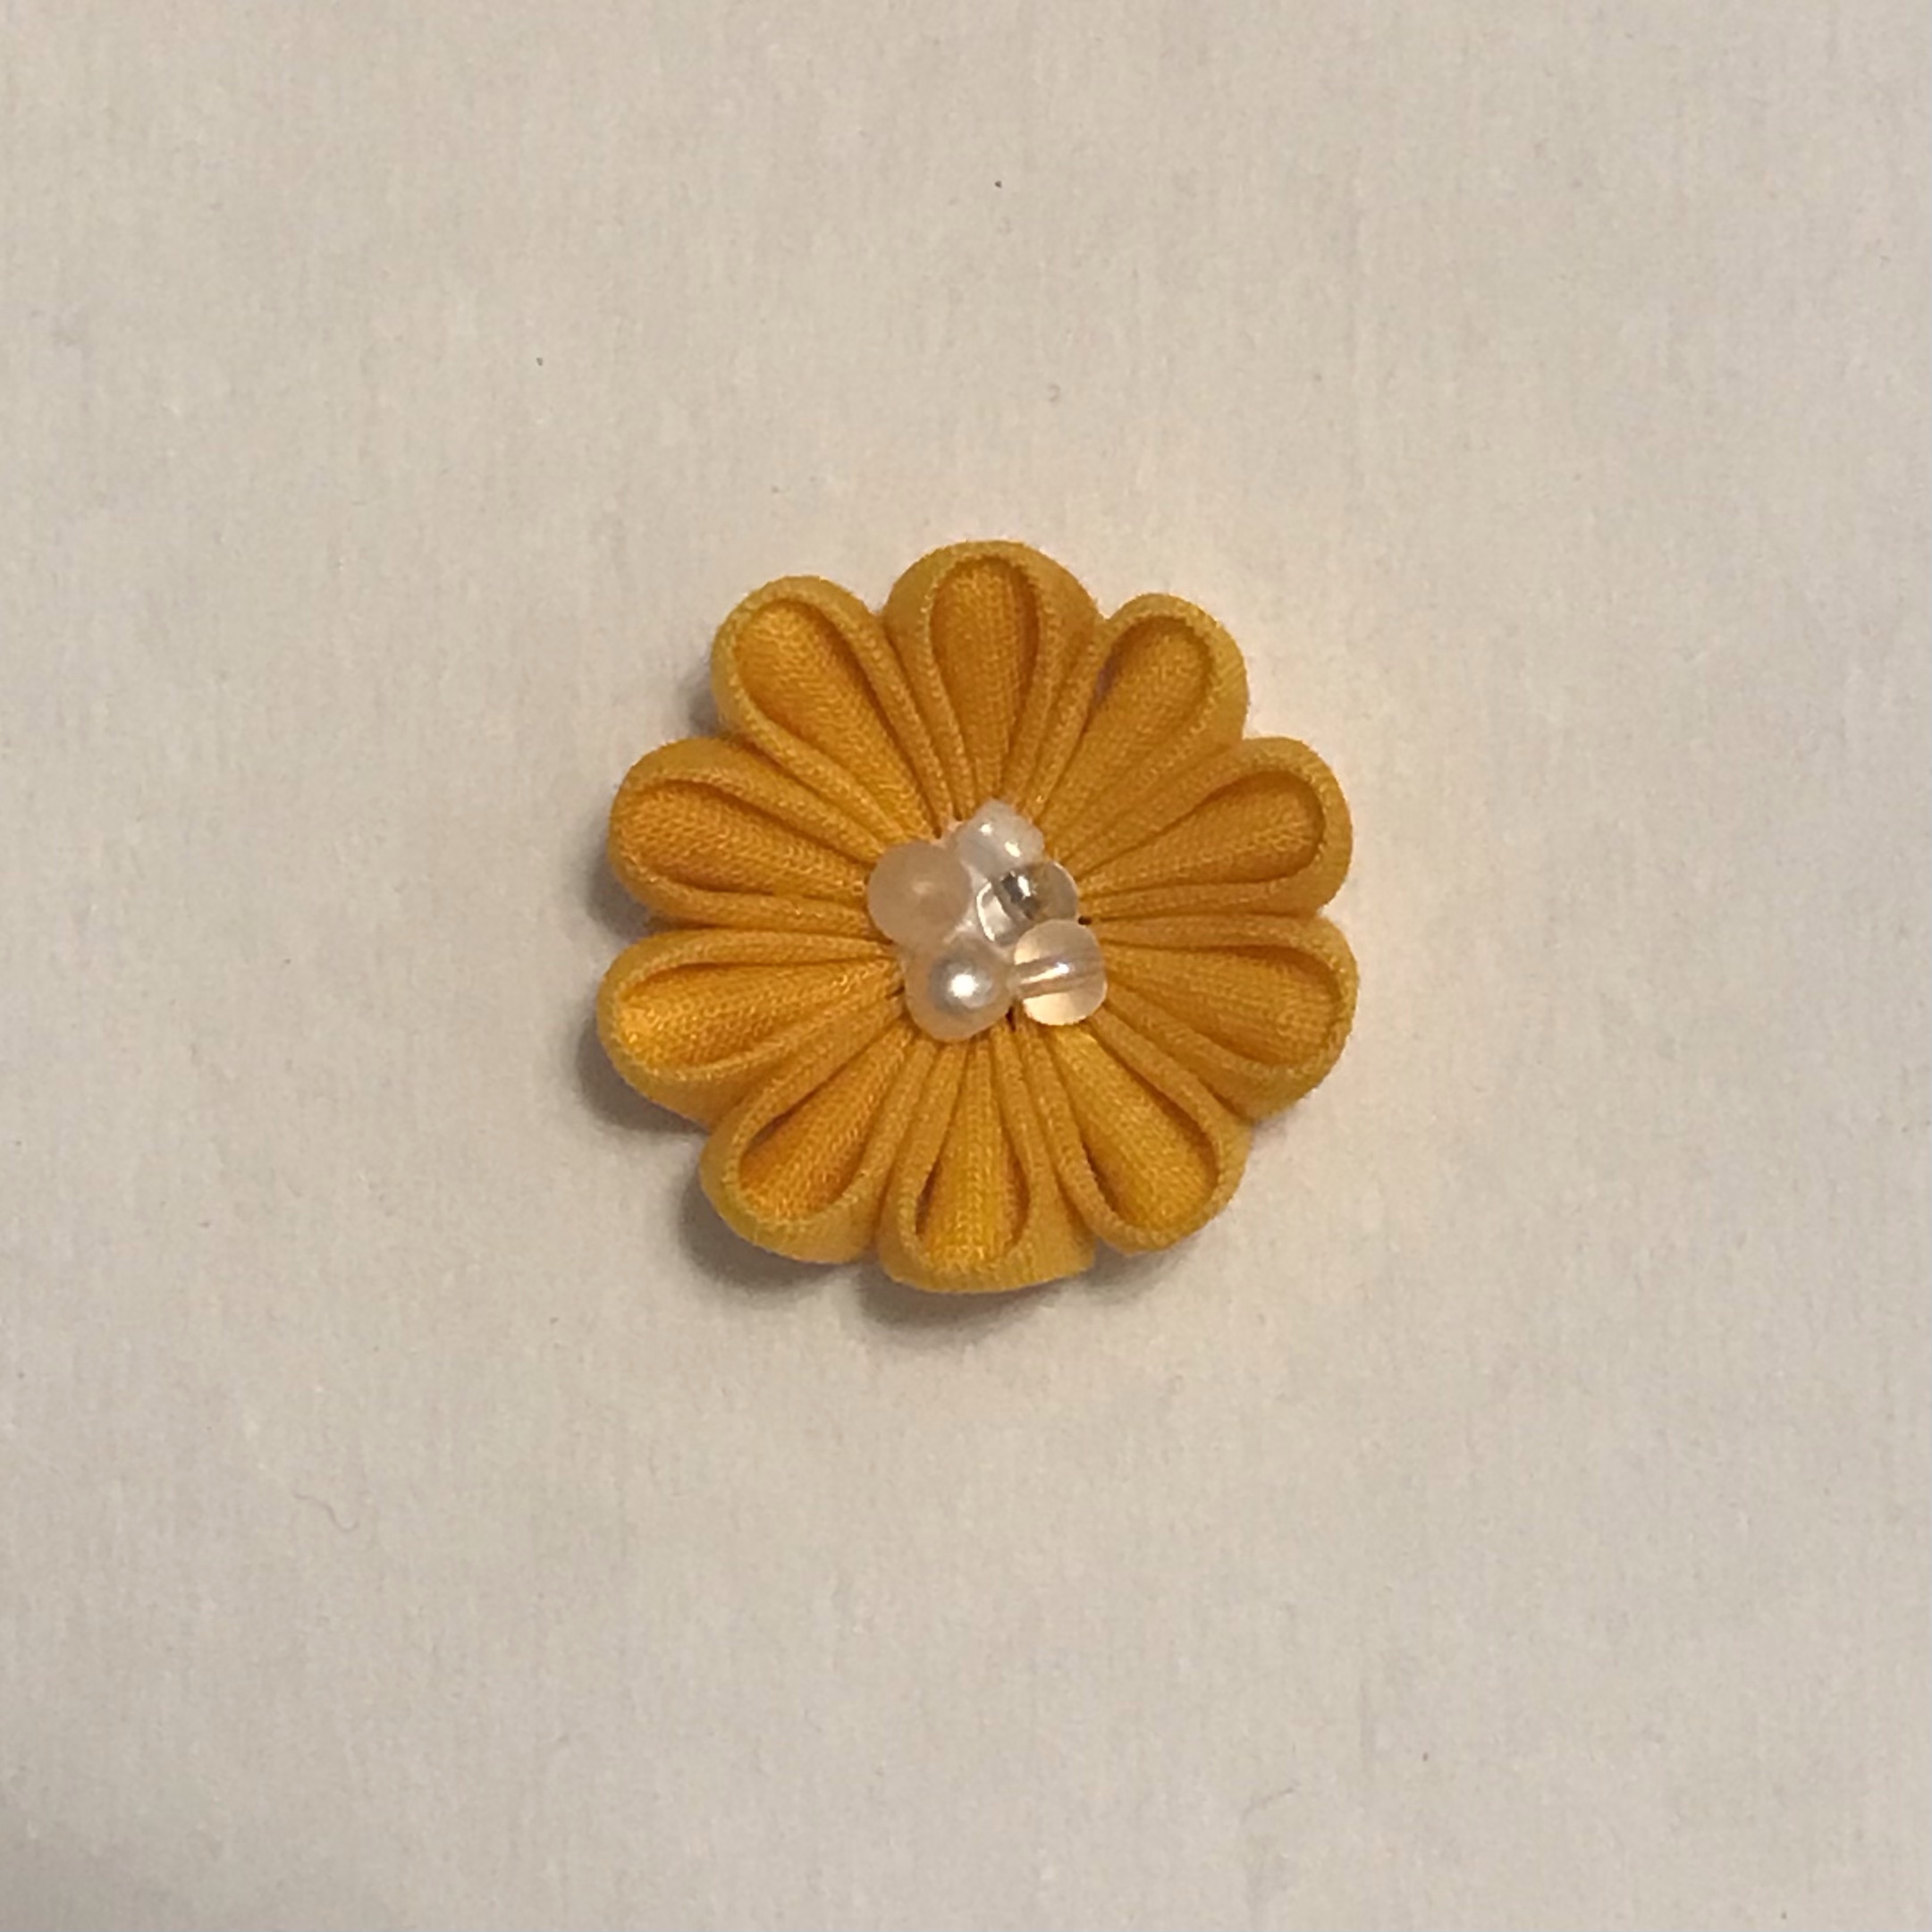
5. Put glue on the center of your flower and place your decoration.
6. Let the glue dry.
7. Done!
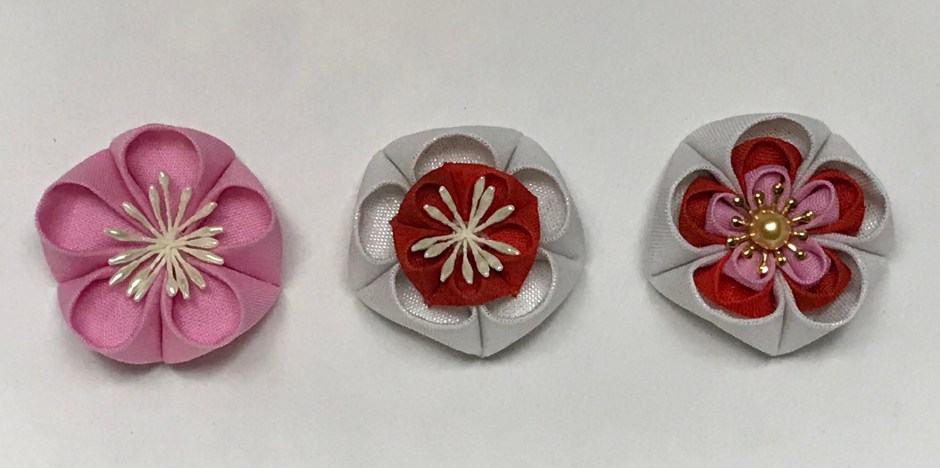
You can also make your flower with Ken-tsumami. (“How to make Ken-tsumami” link here.) A combination of both methods is beautiful too! Enjoy making your own original flowers with Tsumami-zaiku!
“Ume”, which is in my family name, is a very familiar plant for Japanese. We love not only flowers but also fruits.
“Ume” is a Japanese plum. It came from China about 1500 years ago. After that, there have been breed improvements, and there are more than 300 breeds now. “Ume” blooms and flowers even in the cold weather of the end of winter and tells us the arrival of spring, so “Ume” is also familiar as auspicious in Japan.
The fruit is edible. However, the underripe fruit is toxic so you need to do the processing. “Ume-boshi” is one of the most famous Japanese traditional foods and it is made by salting. We also make plum wine and syrup.
“Ume” fruit is rich in organic acids. People in the past treated it as a medicine sometimes because they knew its effects of recovery from physical exhaustion and disinfection.
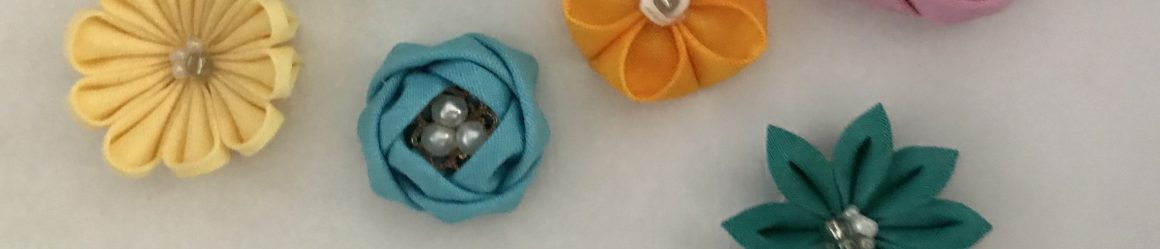
You can make it double or triple by putting a smaller flower inside of it. You can arrange the direction of your smaller flower inside. You can put your smaller petals in the same place as bigger petals or between bigger petals.
I think that the stamens are the most important part to make a “Ume” flower. You need to have more stamens, finer and longer one than other flowers. Then lay them down in all directions. These steps make it more like an “Ume” flower.
Tsumami zaiku is a traditional Japanese craft that is accessible to everyone. Its accessories are beautiful and delicate, but they are not difficult to create. You just need a bit of patience.
When I first saw these beautiful Japanese hair ornaments, I did not think I could make one myself. But after learning the basic method, I discovered that it was actually really simple.
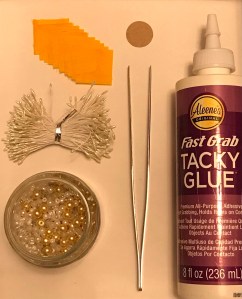
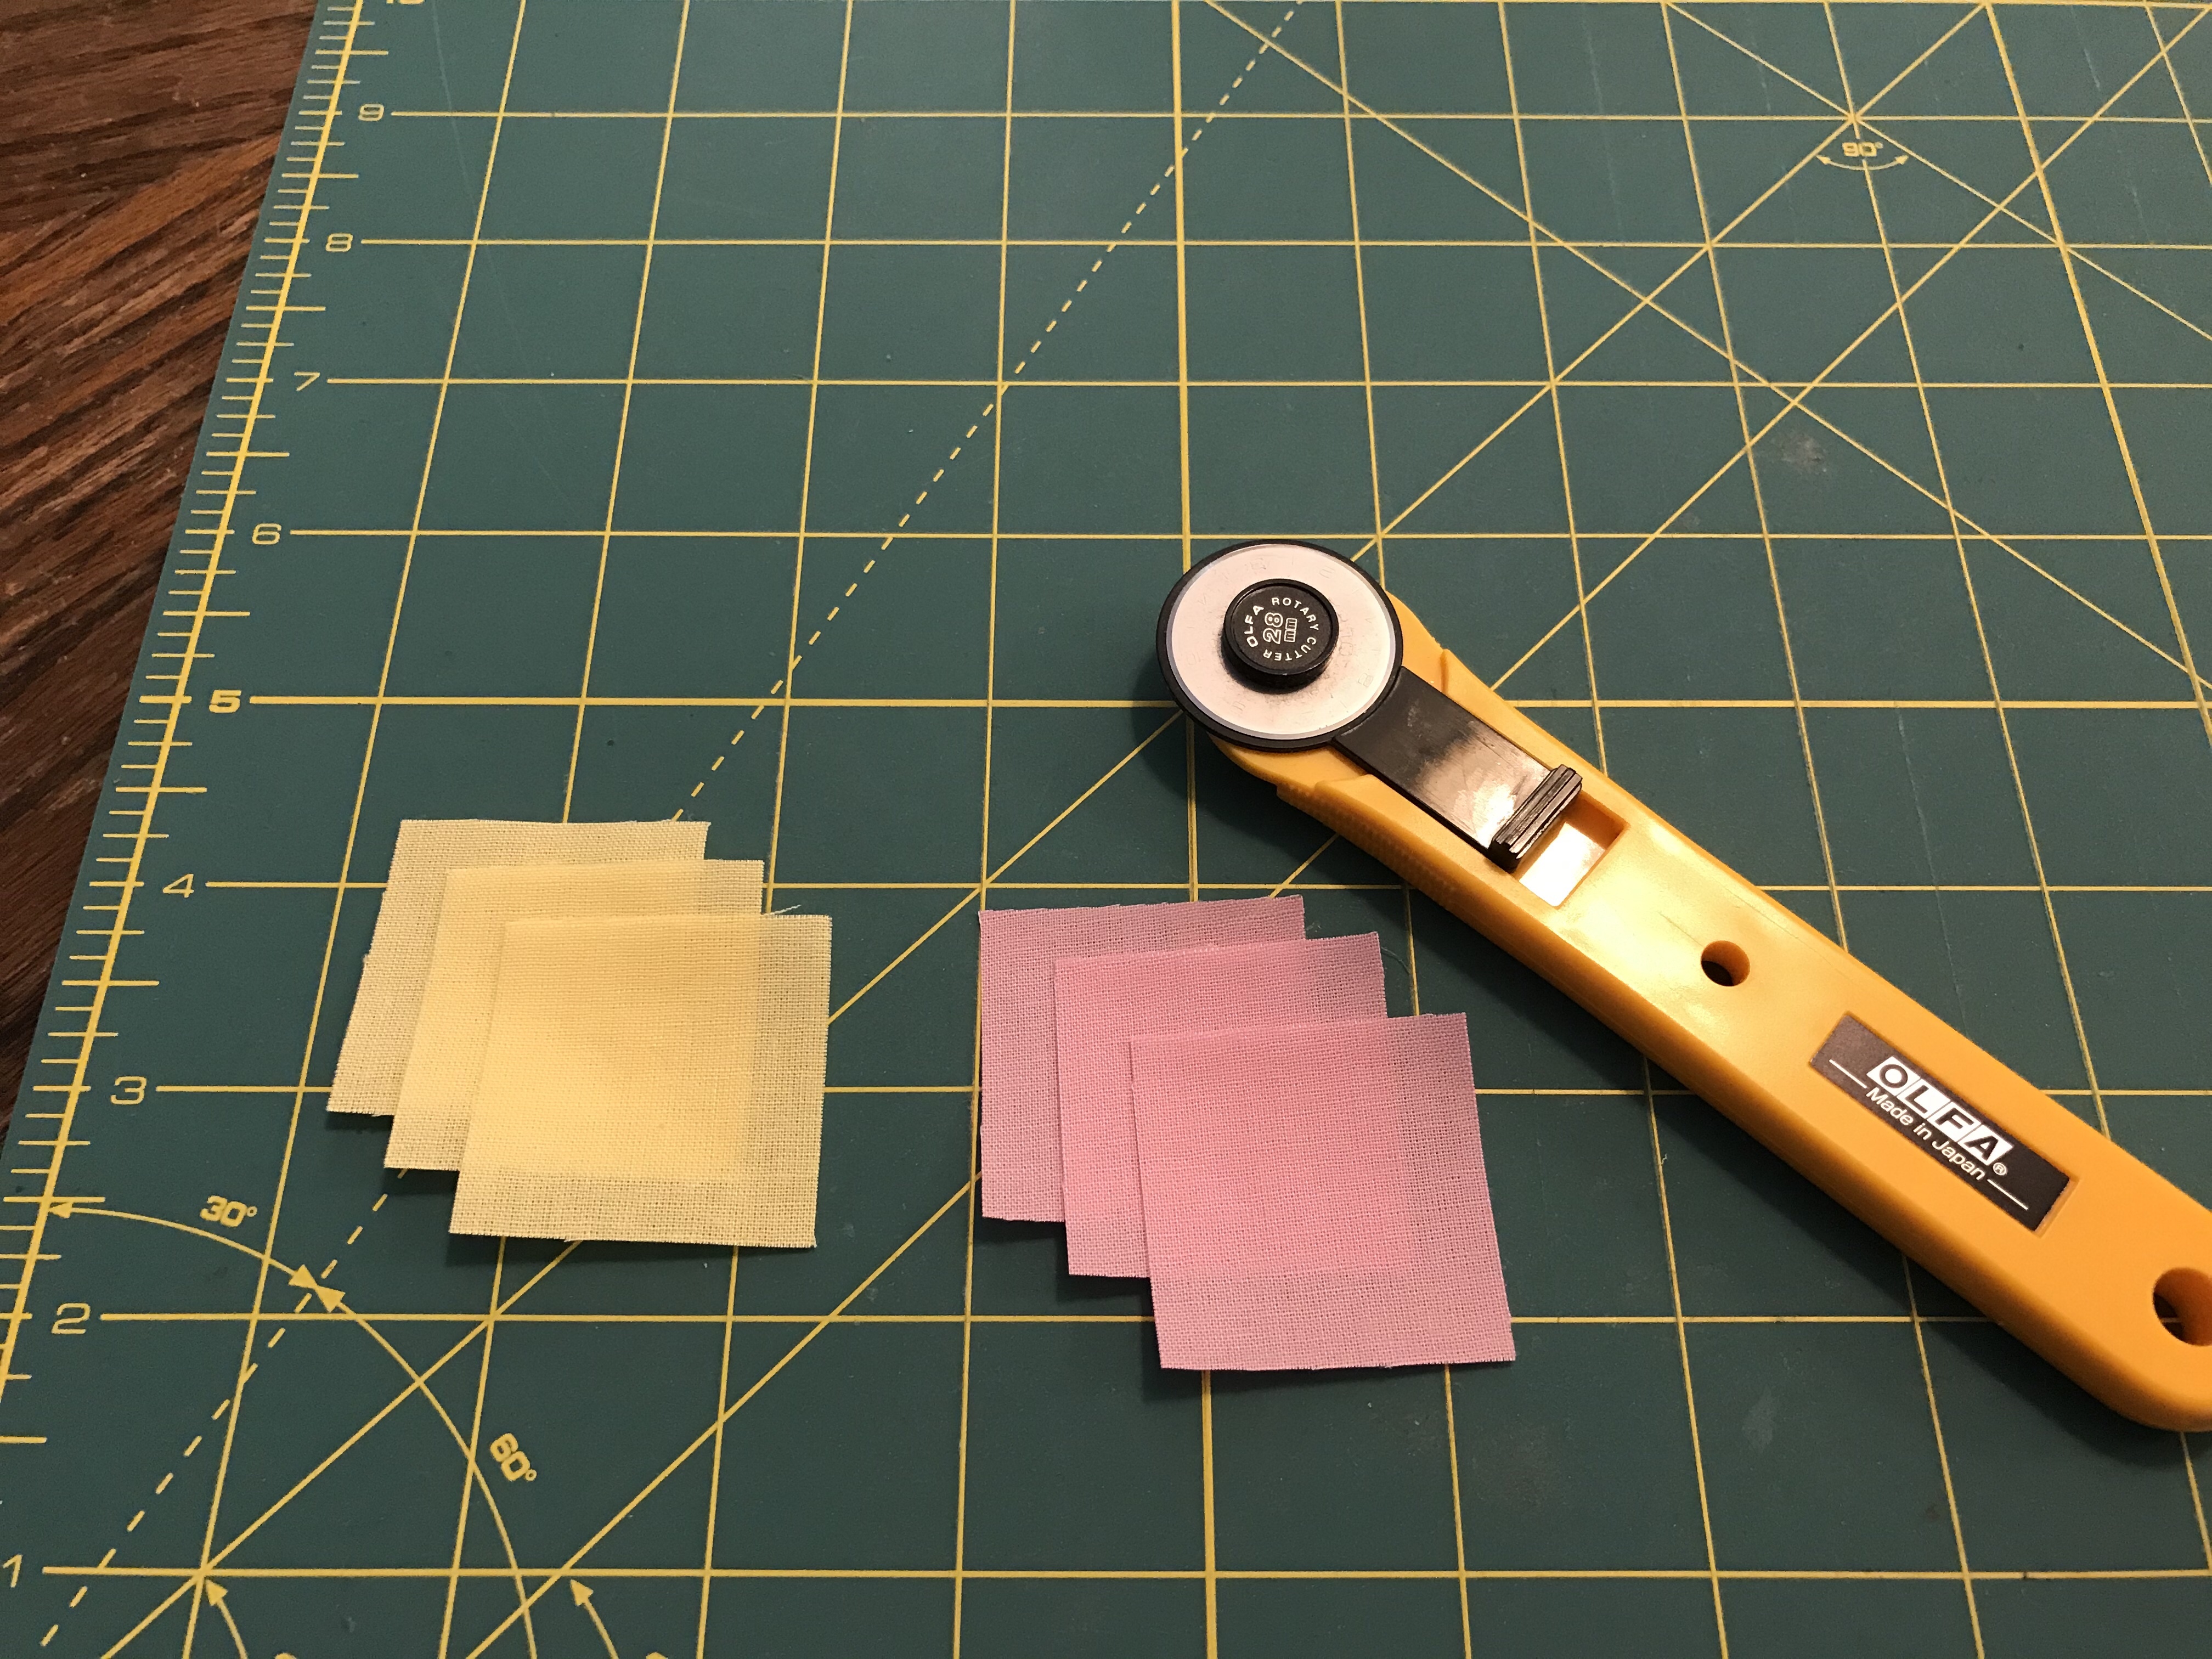
It begins with a cloth square. The size of the square determines the size of the hair piece. Most squares are 0.75 to 1.5 inch size, but I recommend using 1.5 inch size squares when you are just beginning, since it is easier to practice the folding techniques with larger ones. I mentioned patience, but when you make your squares, precision is very important. In this way, it is a lot like origami. In order to get a perfect square, recommend to use a cutting mat with scale on and a rotary cutter.
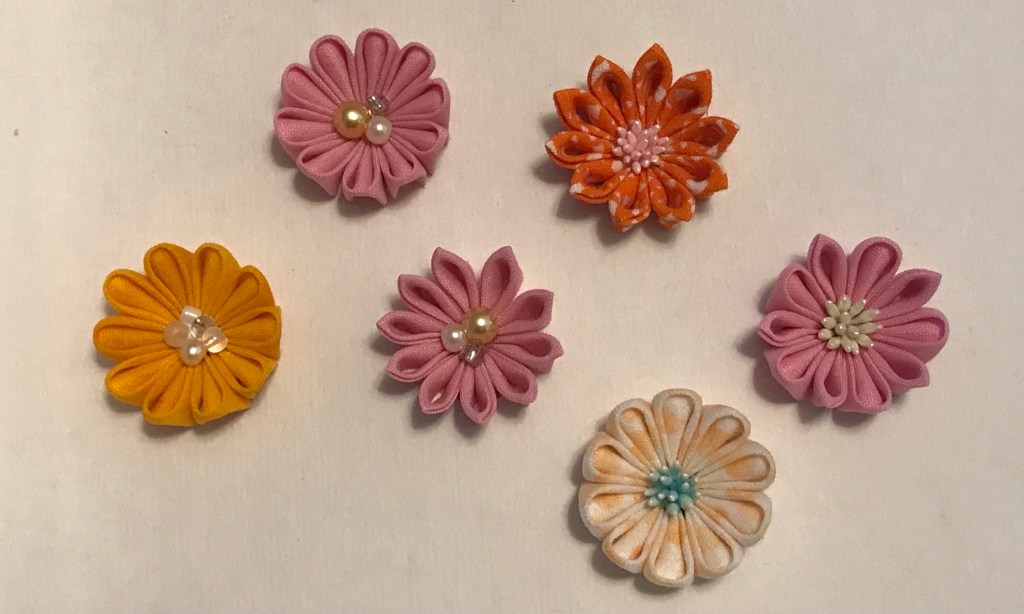
A basic tsumami zaiku flower uses 5 squares, but it differs depending on what you are making.
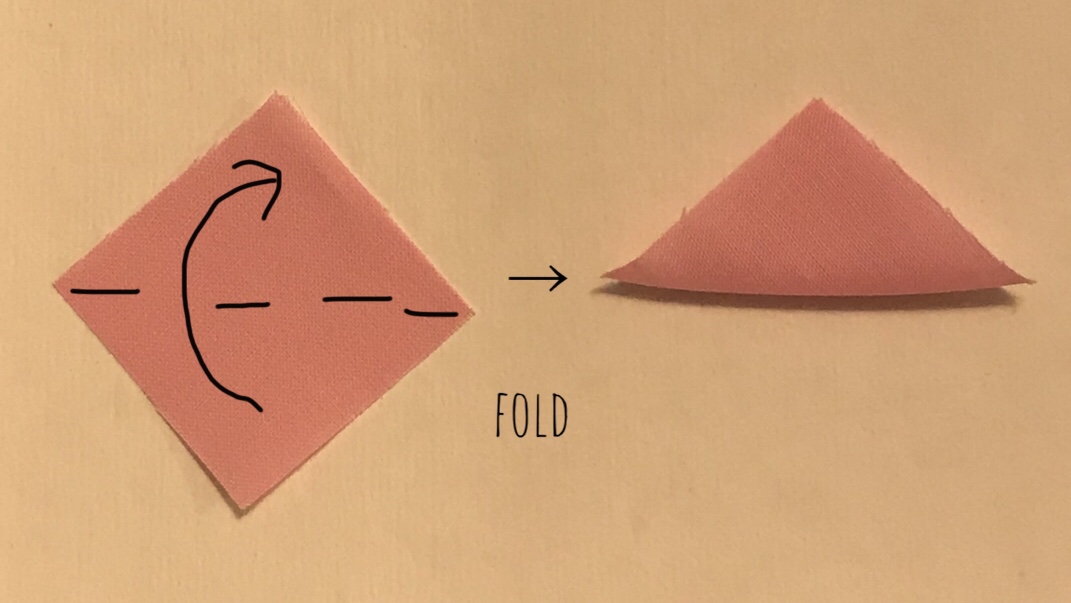
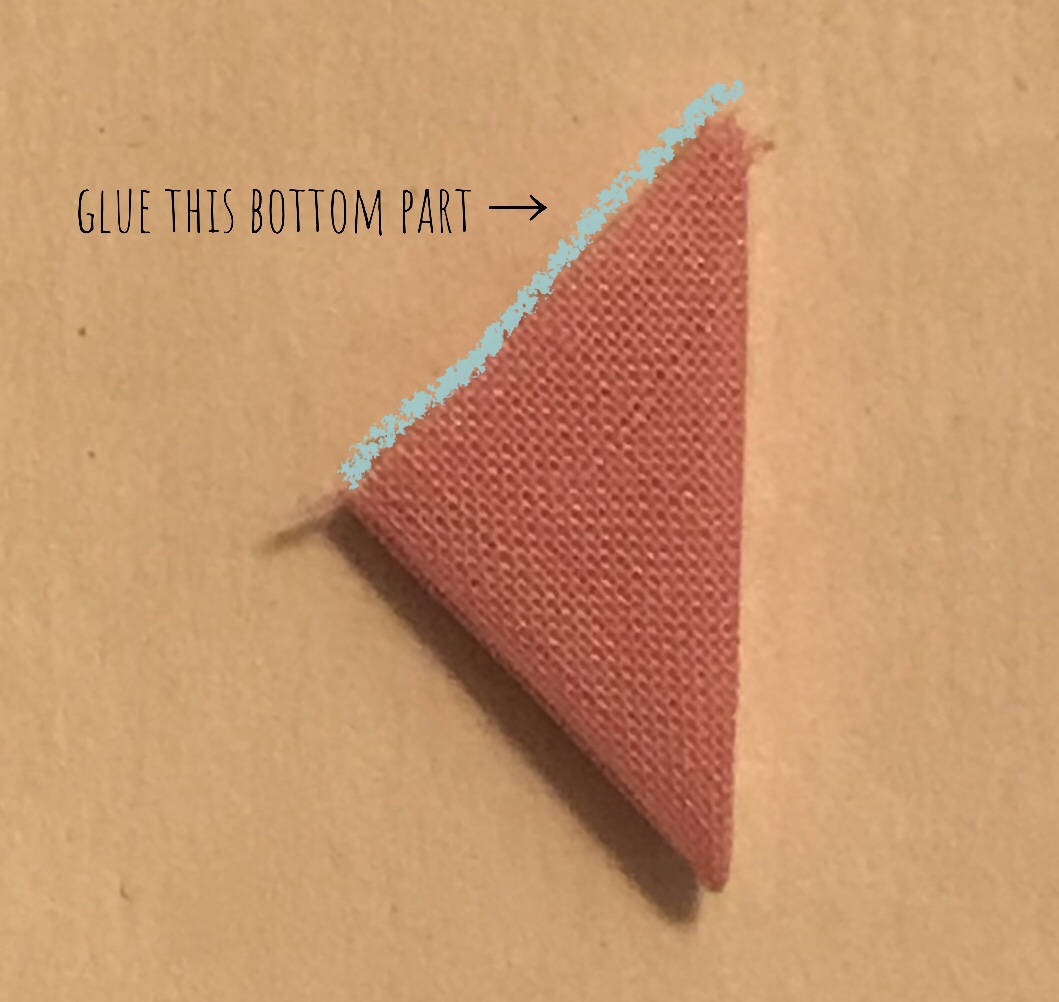
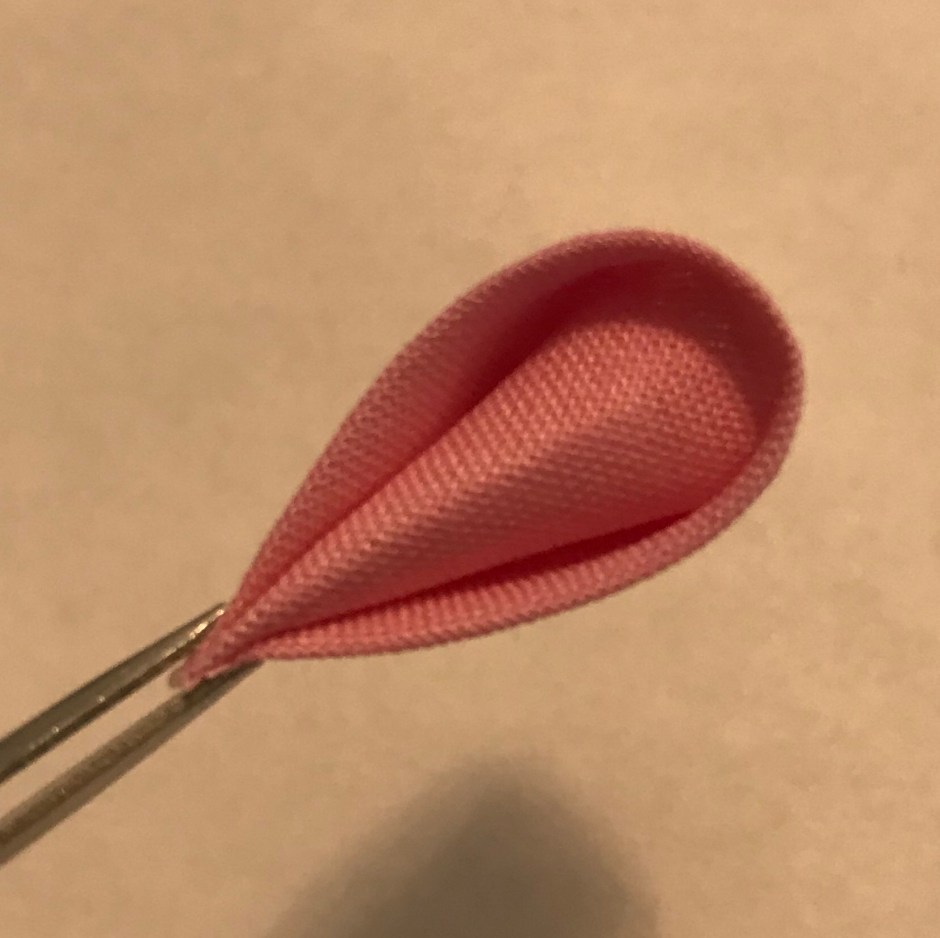
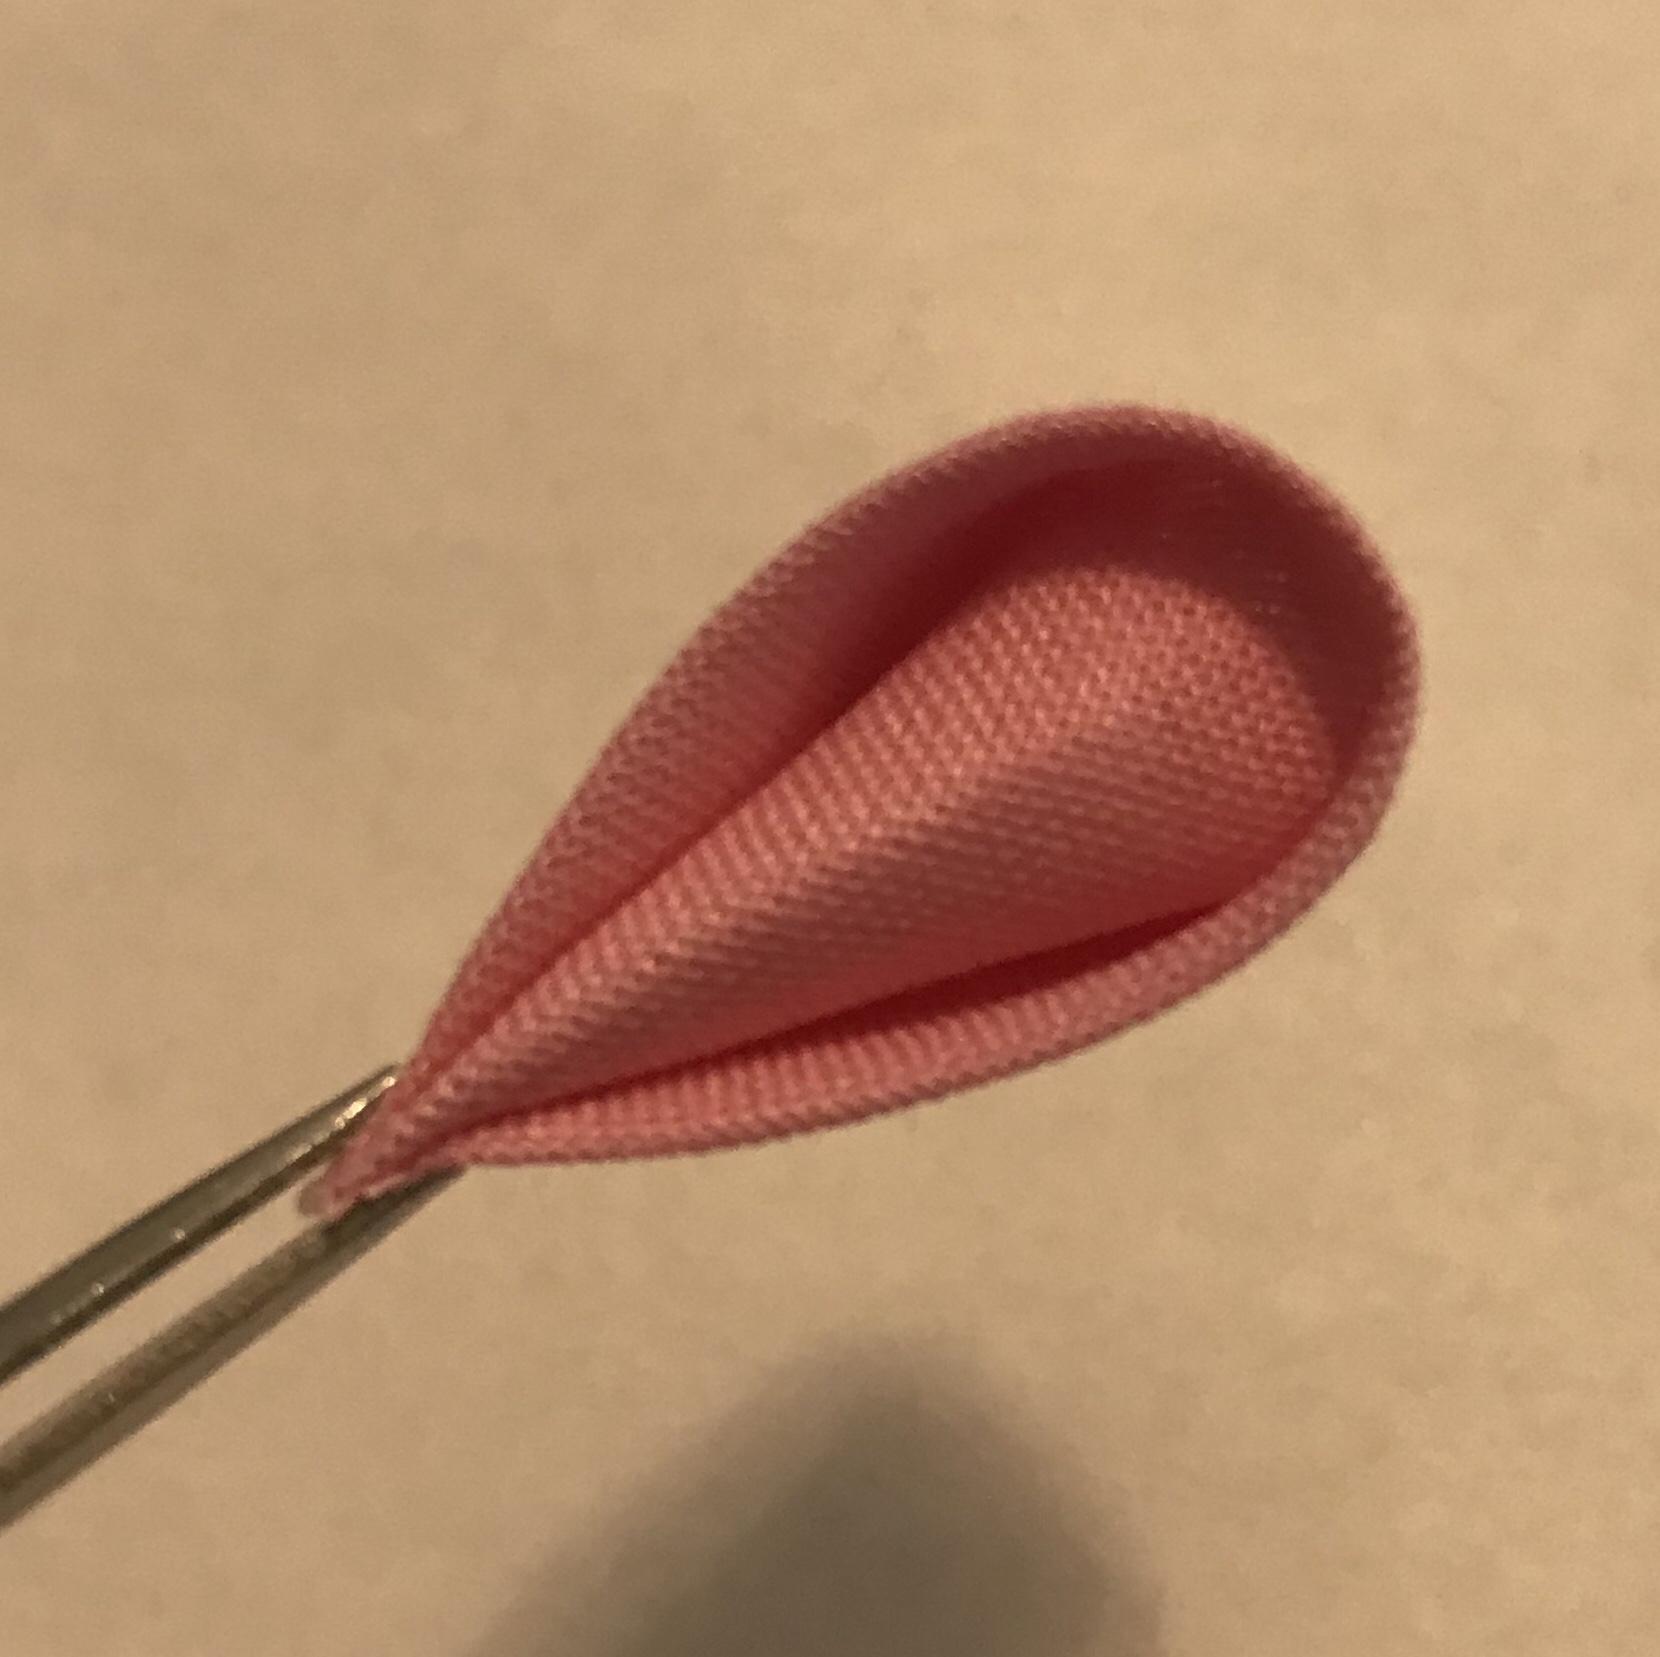
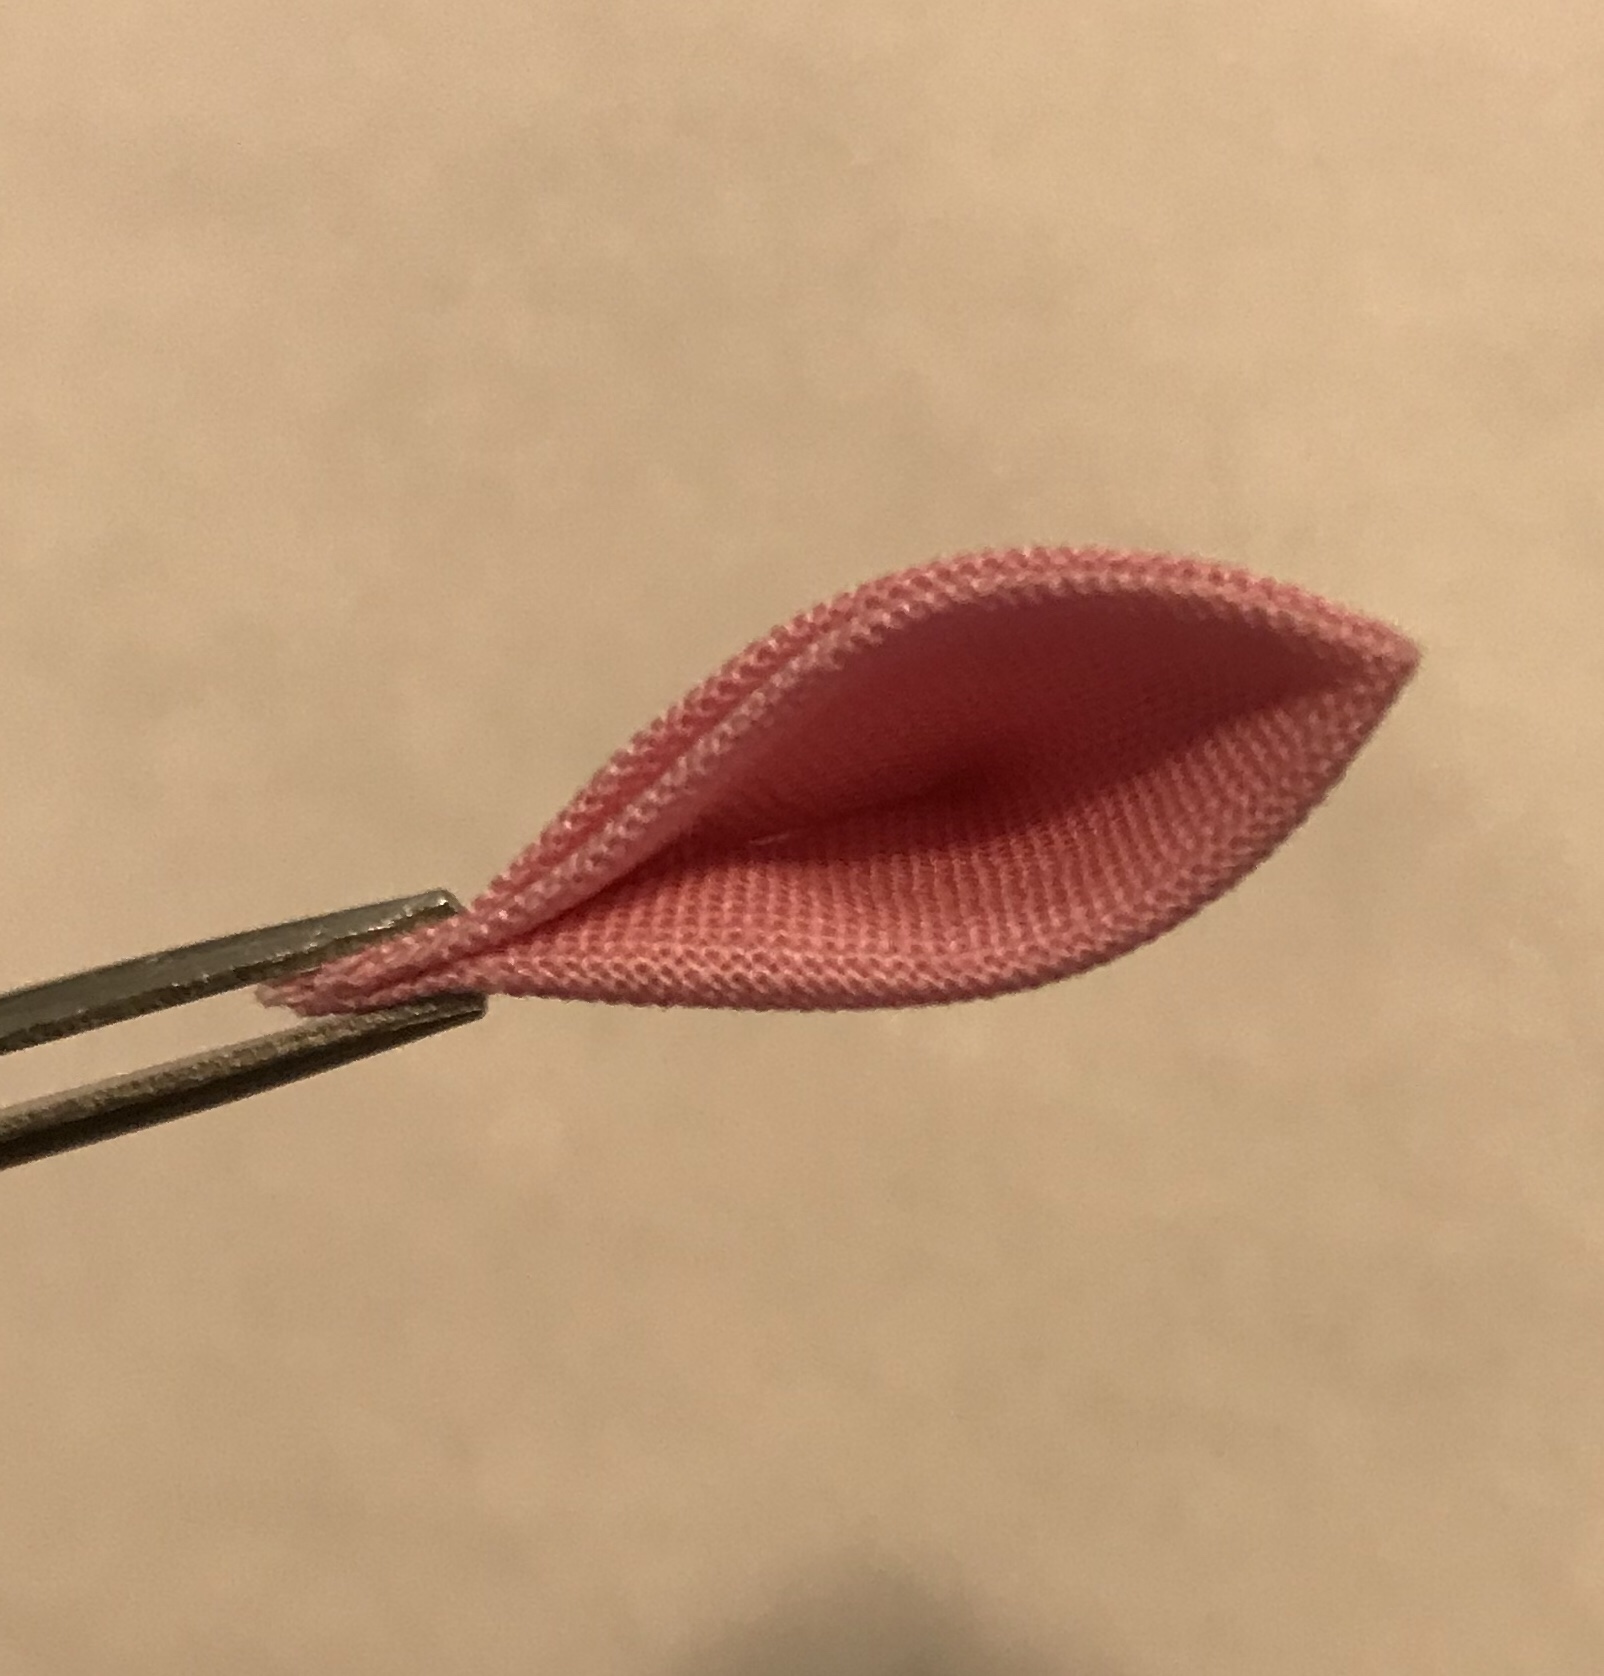
Then, it’s just tucking the square cloth and gluing it down, which creates the shape of a flower petal. There are 2 main tucking methods:
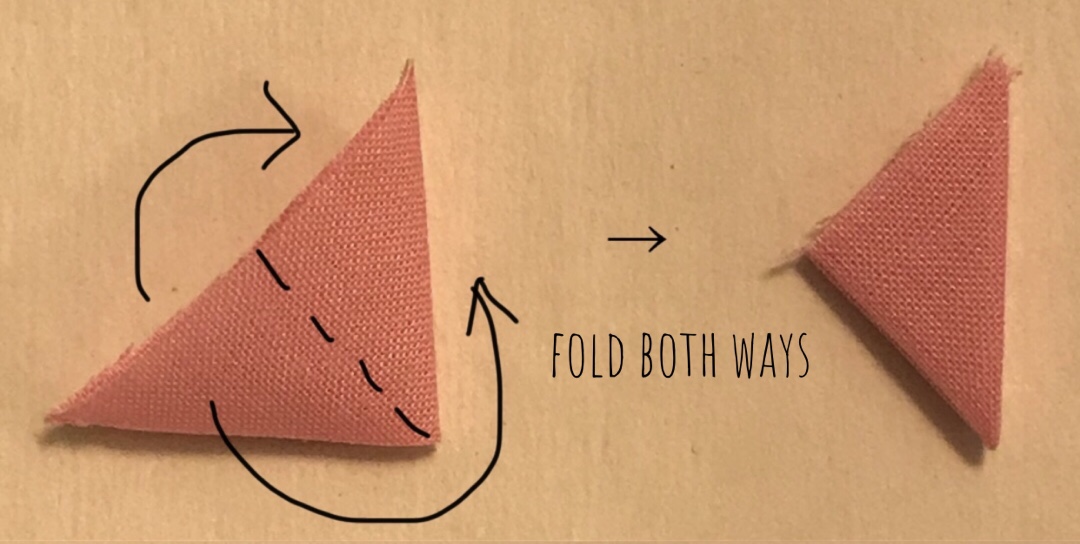
One is called “Maru-tsumami.” “Maru” means round in Japanese, so the edge becomes round using this way.
The other is “Ken-tsumami.” “Ken” means sword, so the edge becomes sharp like a sword.
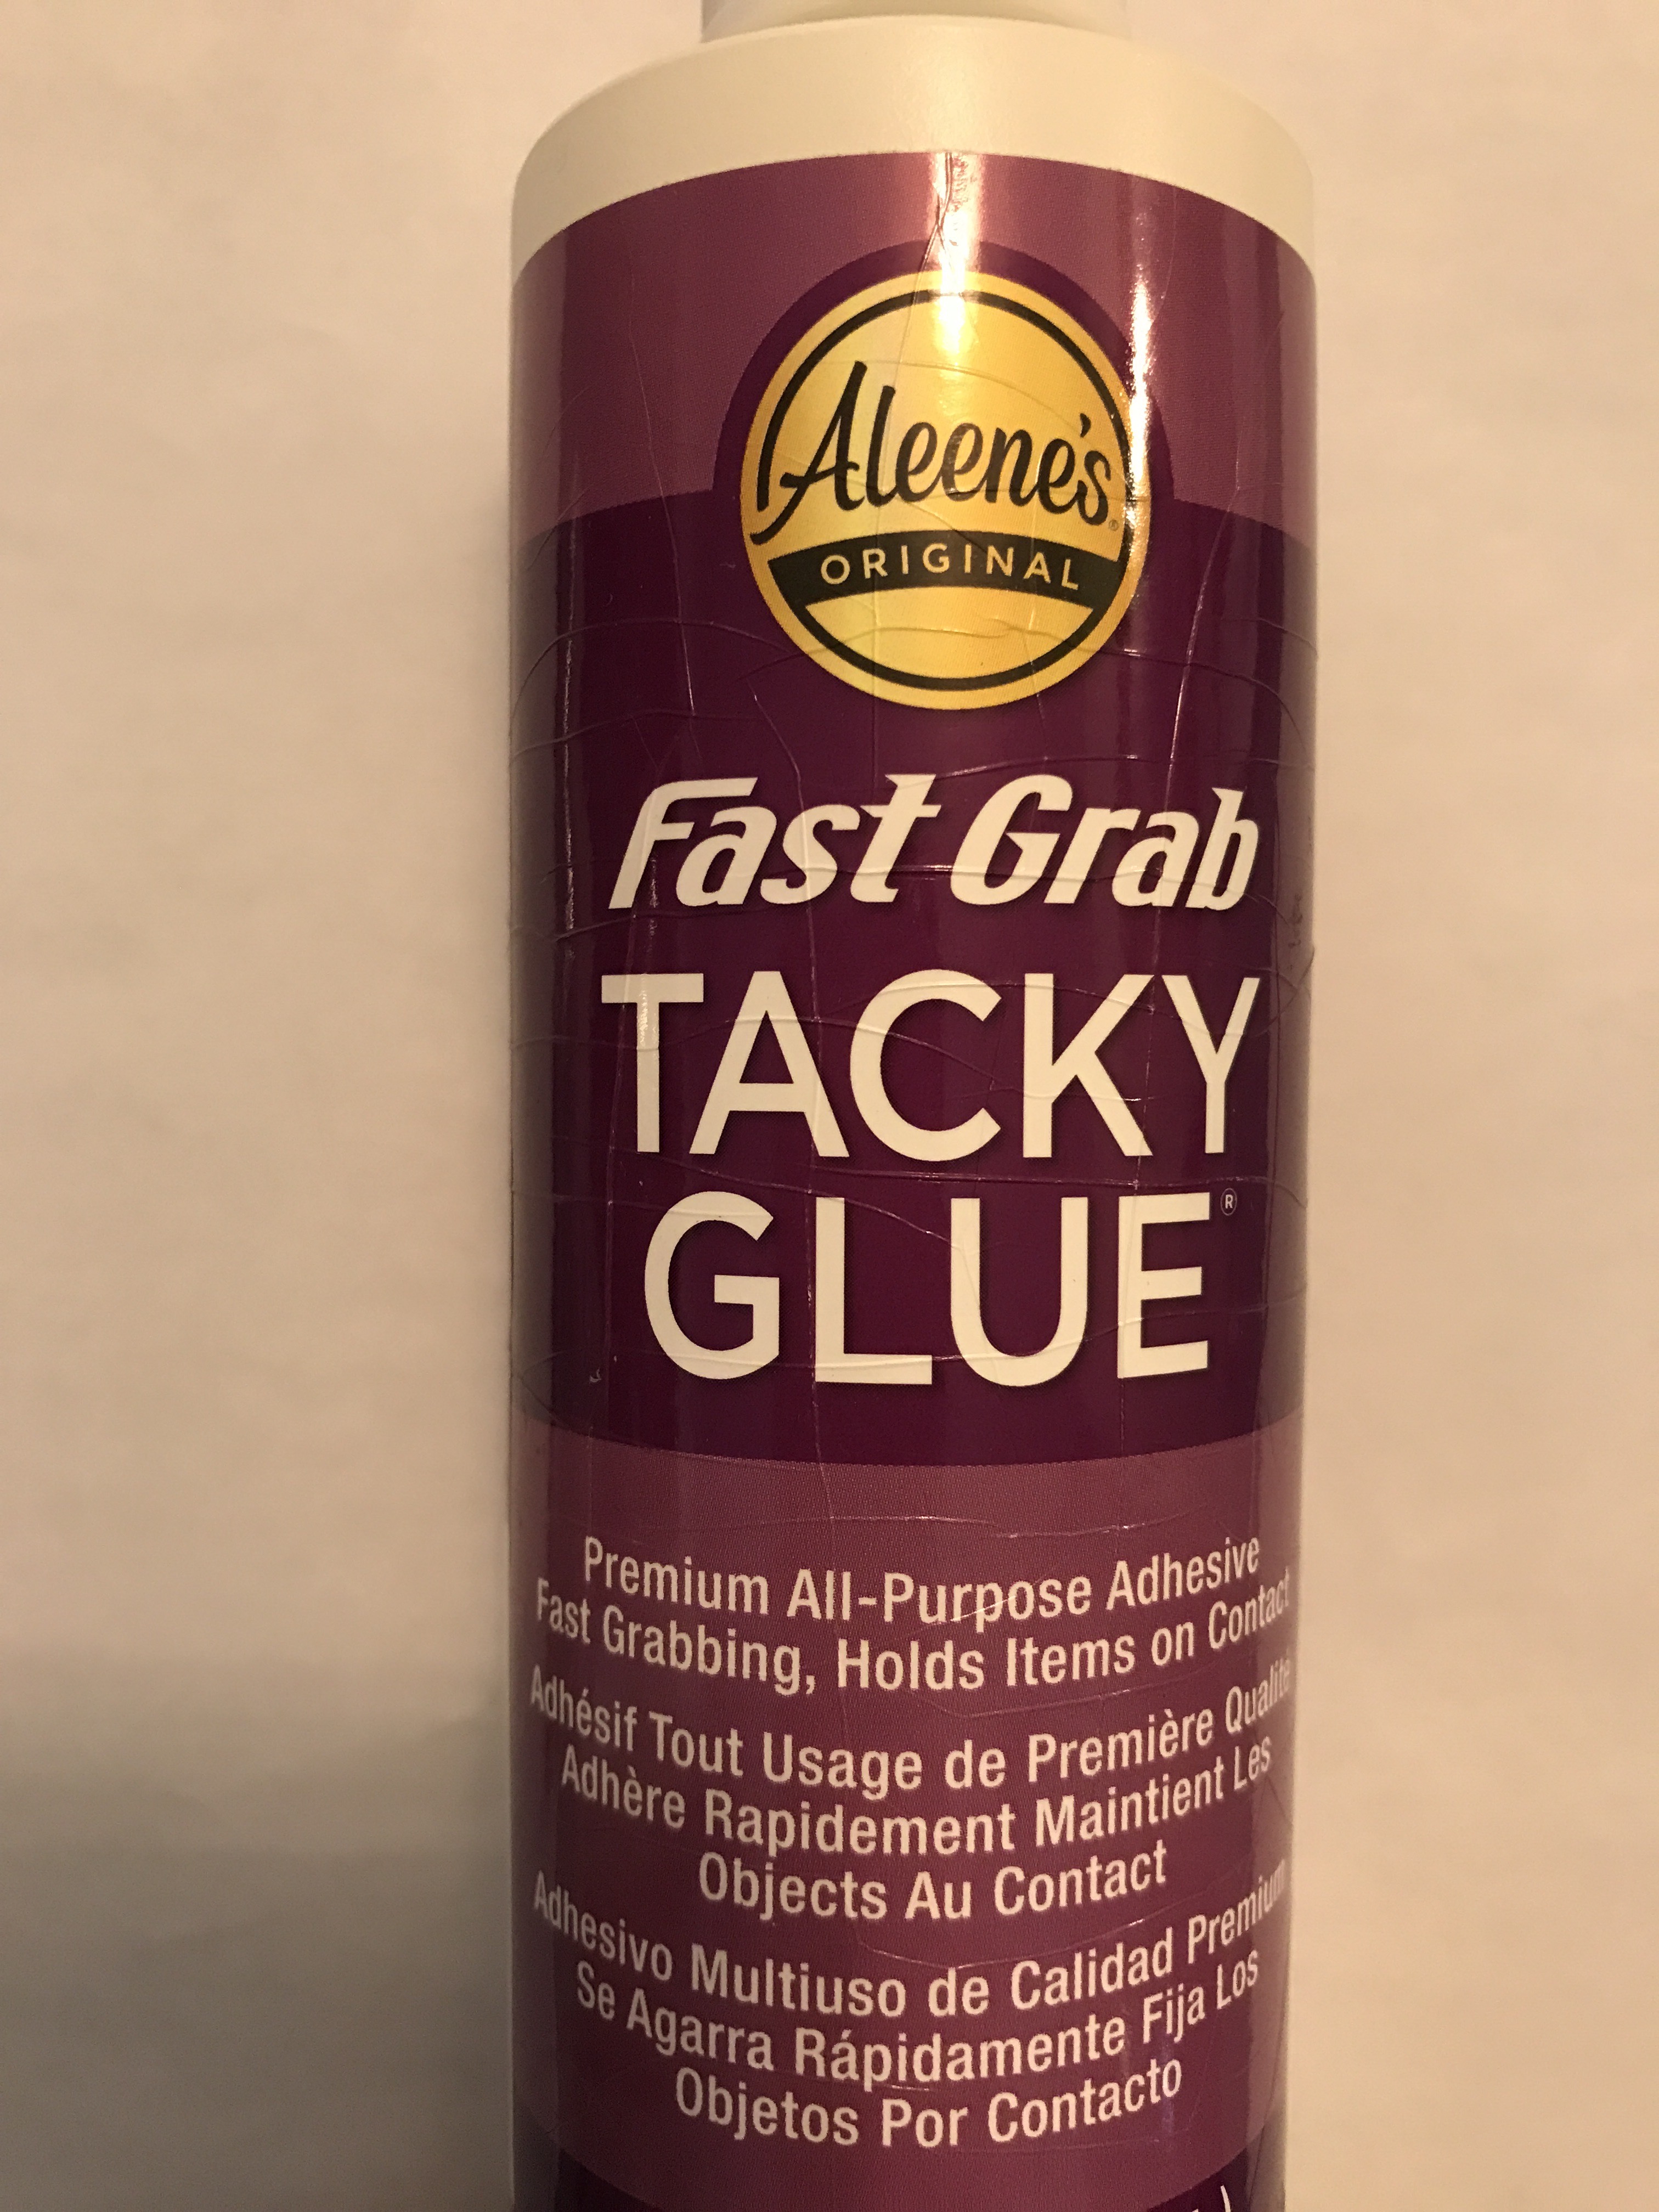
Traditionally, starch was used for glue, but modern tsumami zaiku craftspeople buy their glue at the store. You can use regular glue, but I find that Aleene’s “Fast Grab Tacky Glue” works better on fabric and oparation.
After you have created the individual flower petals, you arrange them together to make the flower itself. You can make infinite kinds of creations with different combinations of tucking, colors, sizes, and arrangement.
The process of making the petals and arranging them is not difficult, but it does take patience. I find the process meditative and use it to clear my mind. Tsumami zaiku, like many traditional Japanese crafts, can be used to calm and center oneself. I hope after trying it yourself, you will come to love making tsumami zaiku accessories as much as I do!
“Kanzashi” (hair accessories) are as old as Japan, but it is said that women at the ancient palace in Kyoto started making them using leftover kimono cloth. It was later, during the Edo era, when tsumami zaiku spread to east Japan and became a professional craft.
Edo, another name for ancient Tokyo, became a major production area. “Daimyo” (local warlords) were required to visit the shogun in Edo once every 2 years, and tsumami zaiku accessories became very popular home-coming gifts for their families.
In the early 20th century, tsumami zaiku actually became an optional part of a girl’s education. It was taught in schools as a kind of elective. Nowadays, though, Japanese women have adopted a more western style of fashion for everyday life. Tsumami zaiku accessories are mainly worn at traditional festivals and celebrations along with kimono or yukata. Because Japan has so many holidays, girls who love to dress in traditional Japanese clothing will usually also have a collection of beautiful kanzashi.