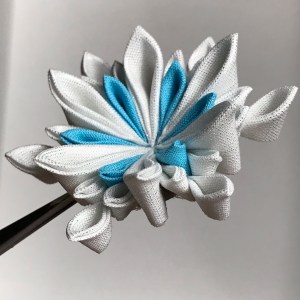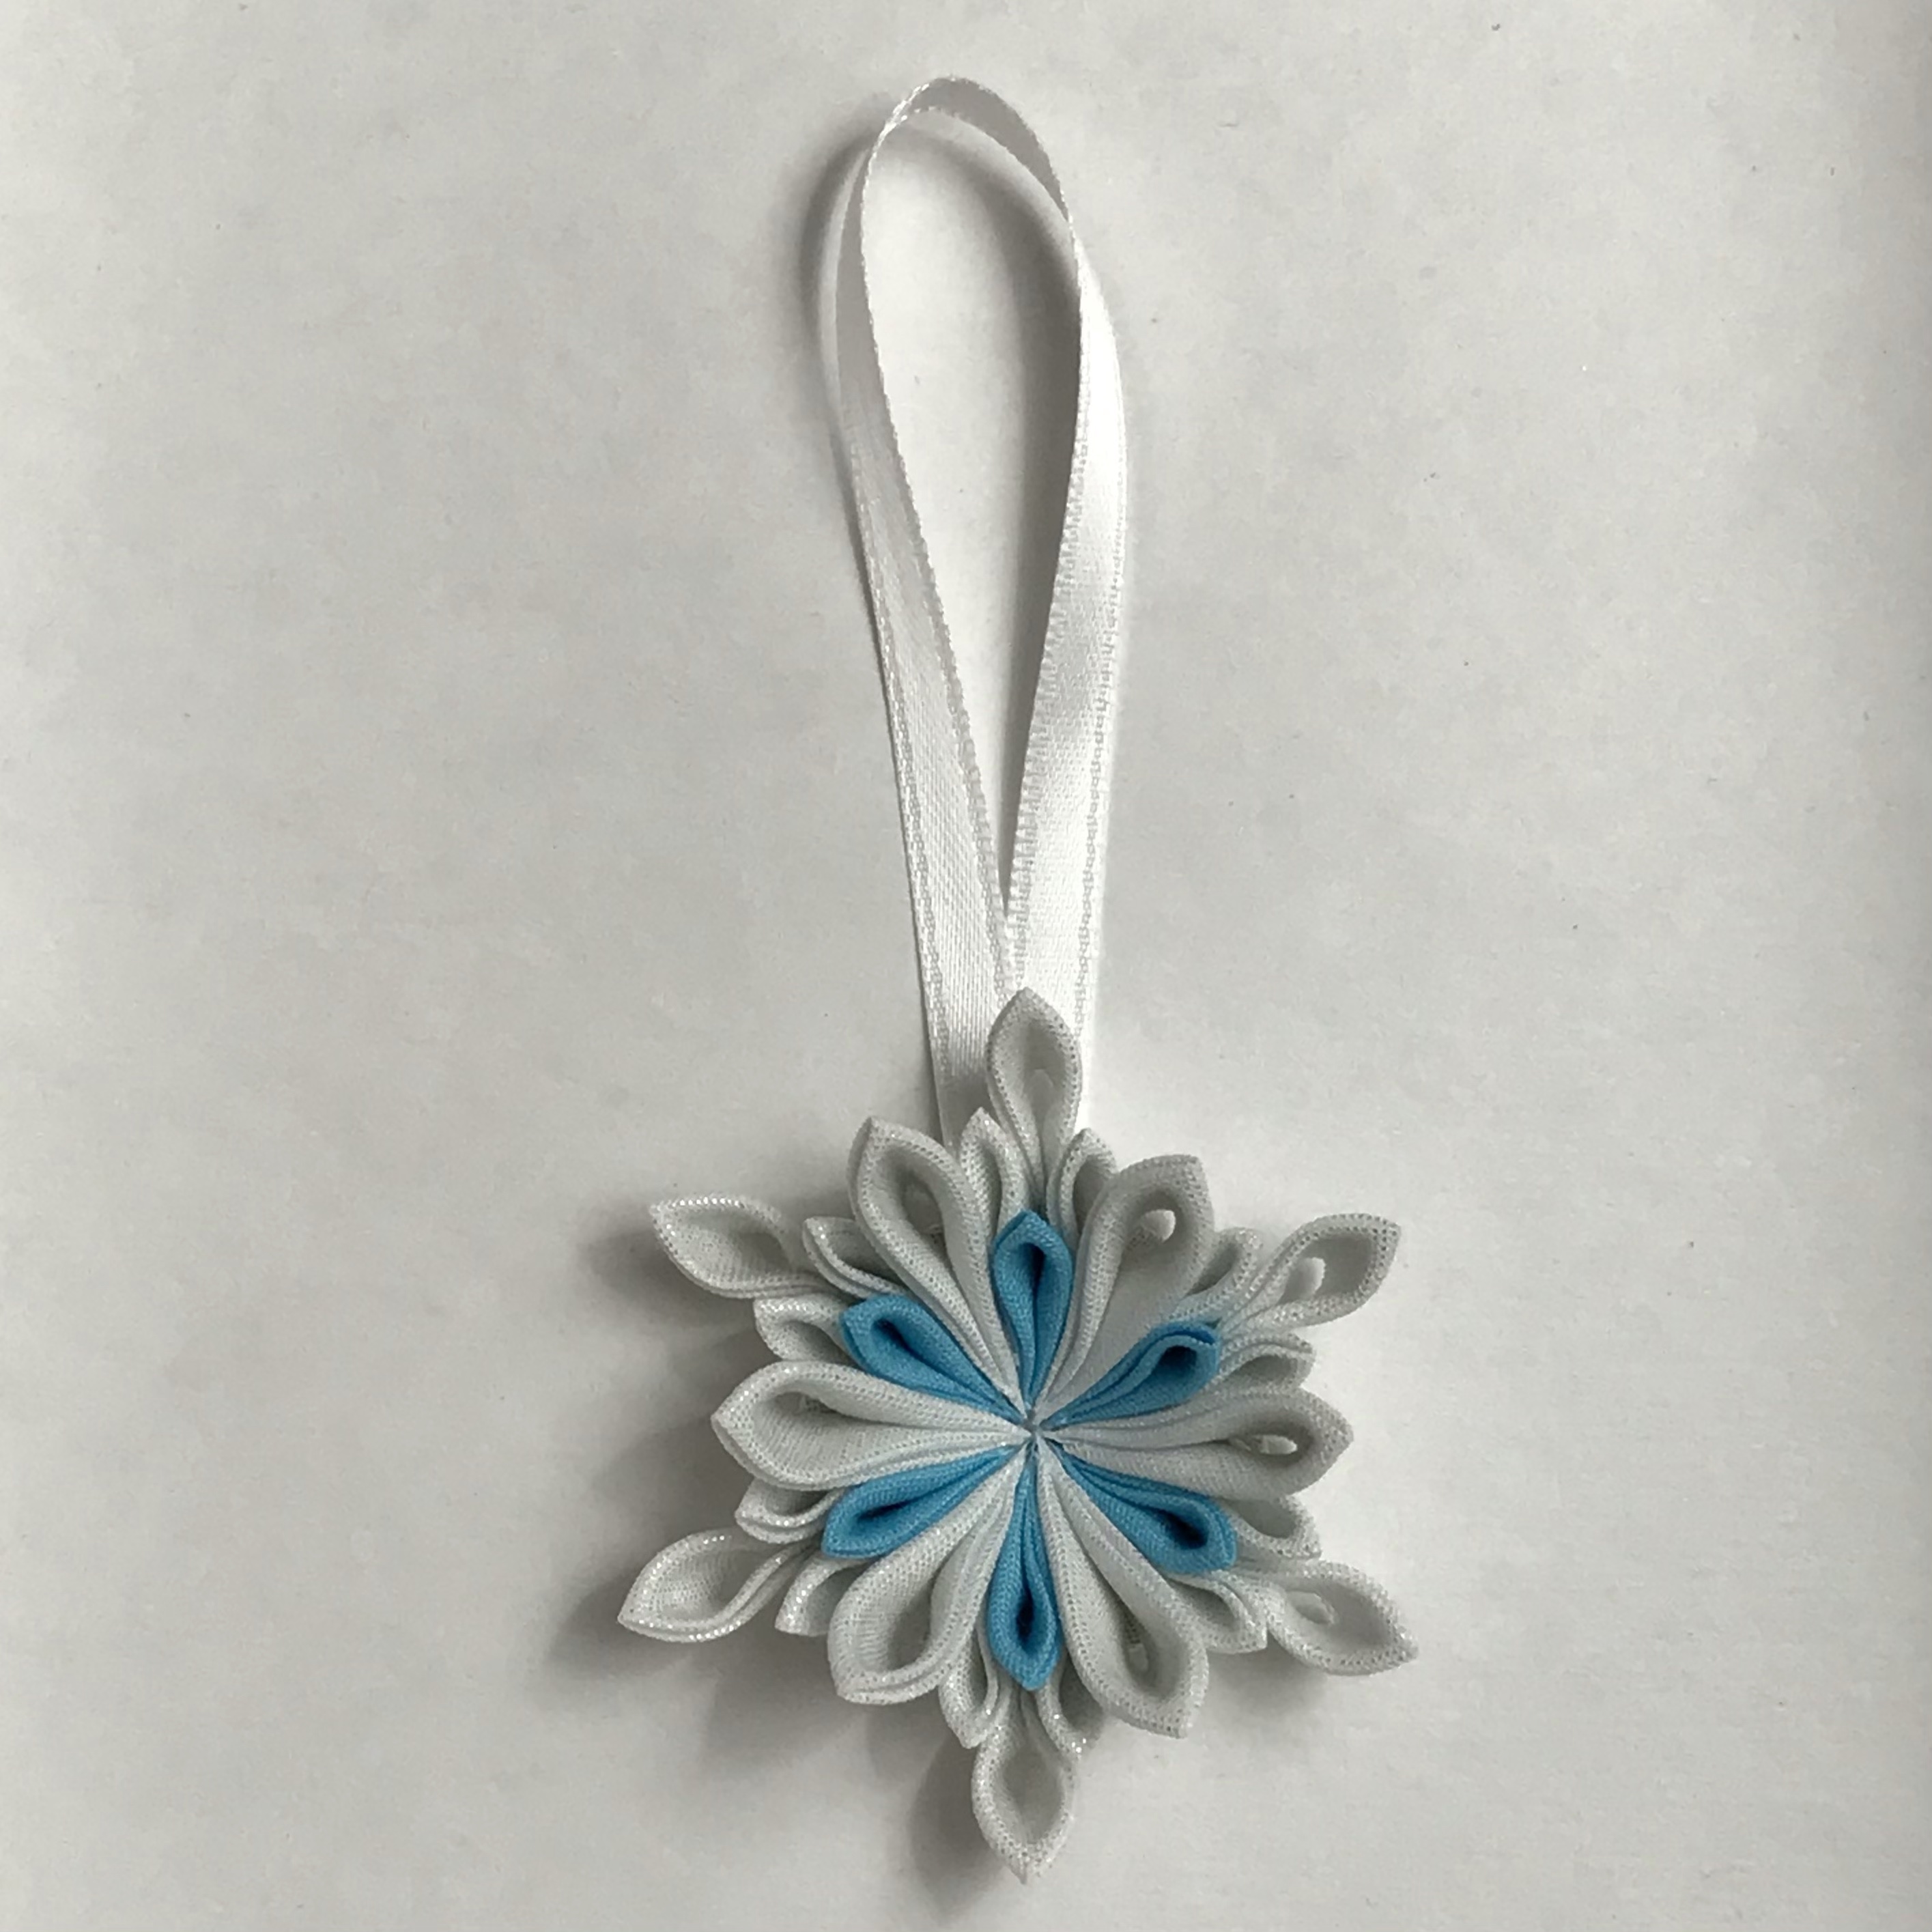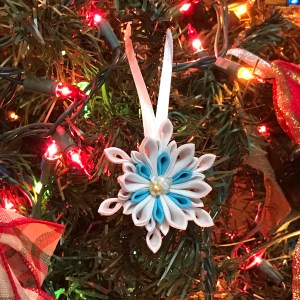
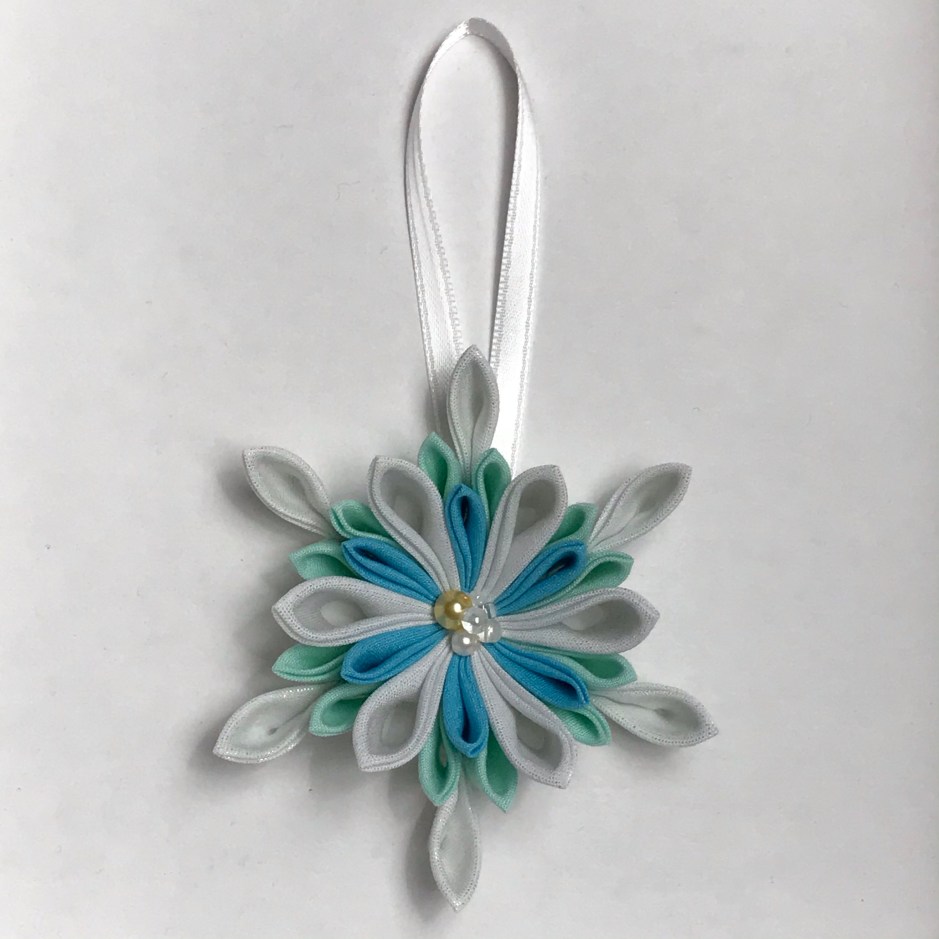
Creates about 3.5 inch (9cm) snowflake
Last time, I made a 2.5 inch (6cm) snowflake ornament. This time, I’m going to share a bigger sized snowflake ornament with the same shape. The way you make it is almost the same. I added one more color to the snowflake, and the cloth sizes are bigger.

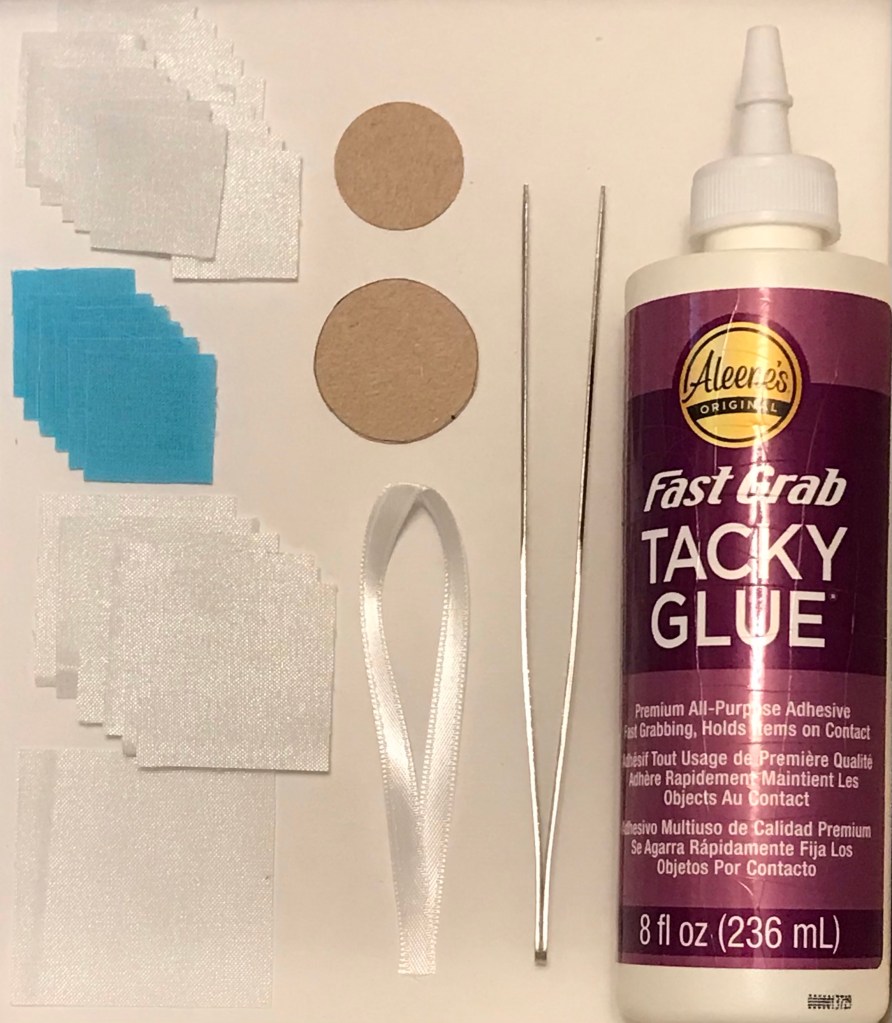
You’ll need:
- six 1.5 inch (3.8 cm) white cloth squares – (A)
- twelve 1.5 inch (3.8 cm) green cloth squares – (B)
- six 1.5 inch (3.8 cm) blue cloth squares – (C)
- six 2 inch (5 cm) white cloth squares – (D)
- one 3 inch (7.5 cm) white cloth square
- decorations for the center of the flower (I use beads and craft flower stamens)
- one 1 inch (2.5 cm) round paper disc (thick paper is better. I use a carton board I cut from things like cereal boxes)
- one 1.5 inch (3.8cm) round paper disc (thick paper is better)
- one 8 inch (20 cm) ribbon or string
- glue
- tweezers (You don’t need tweezers, but it’s much easier with them)
- wet paper towels for cleaning your fingers
Instructions:

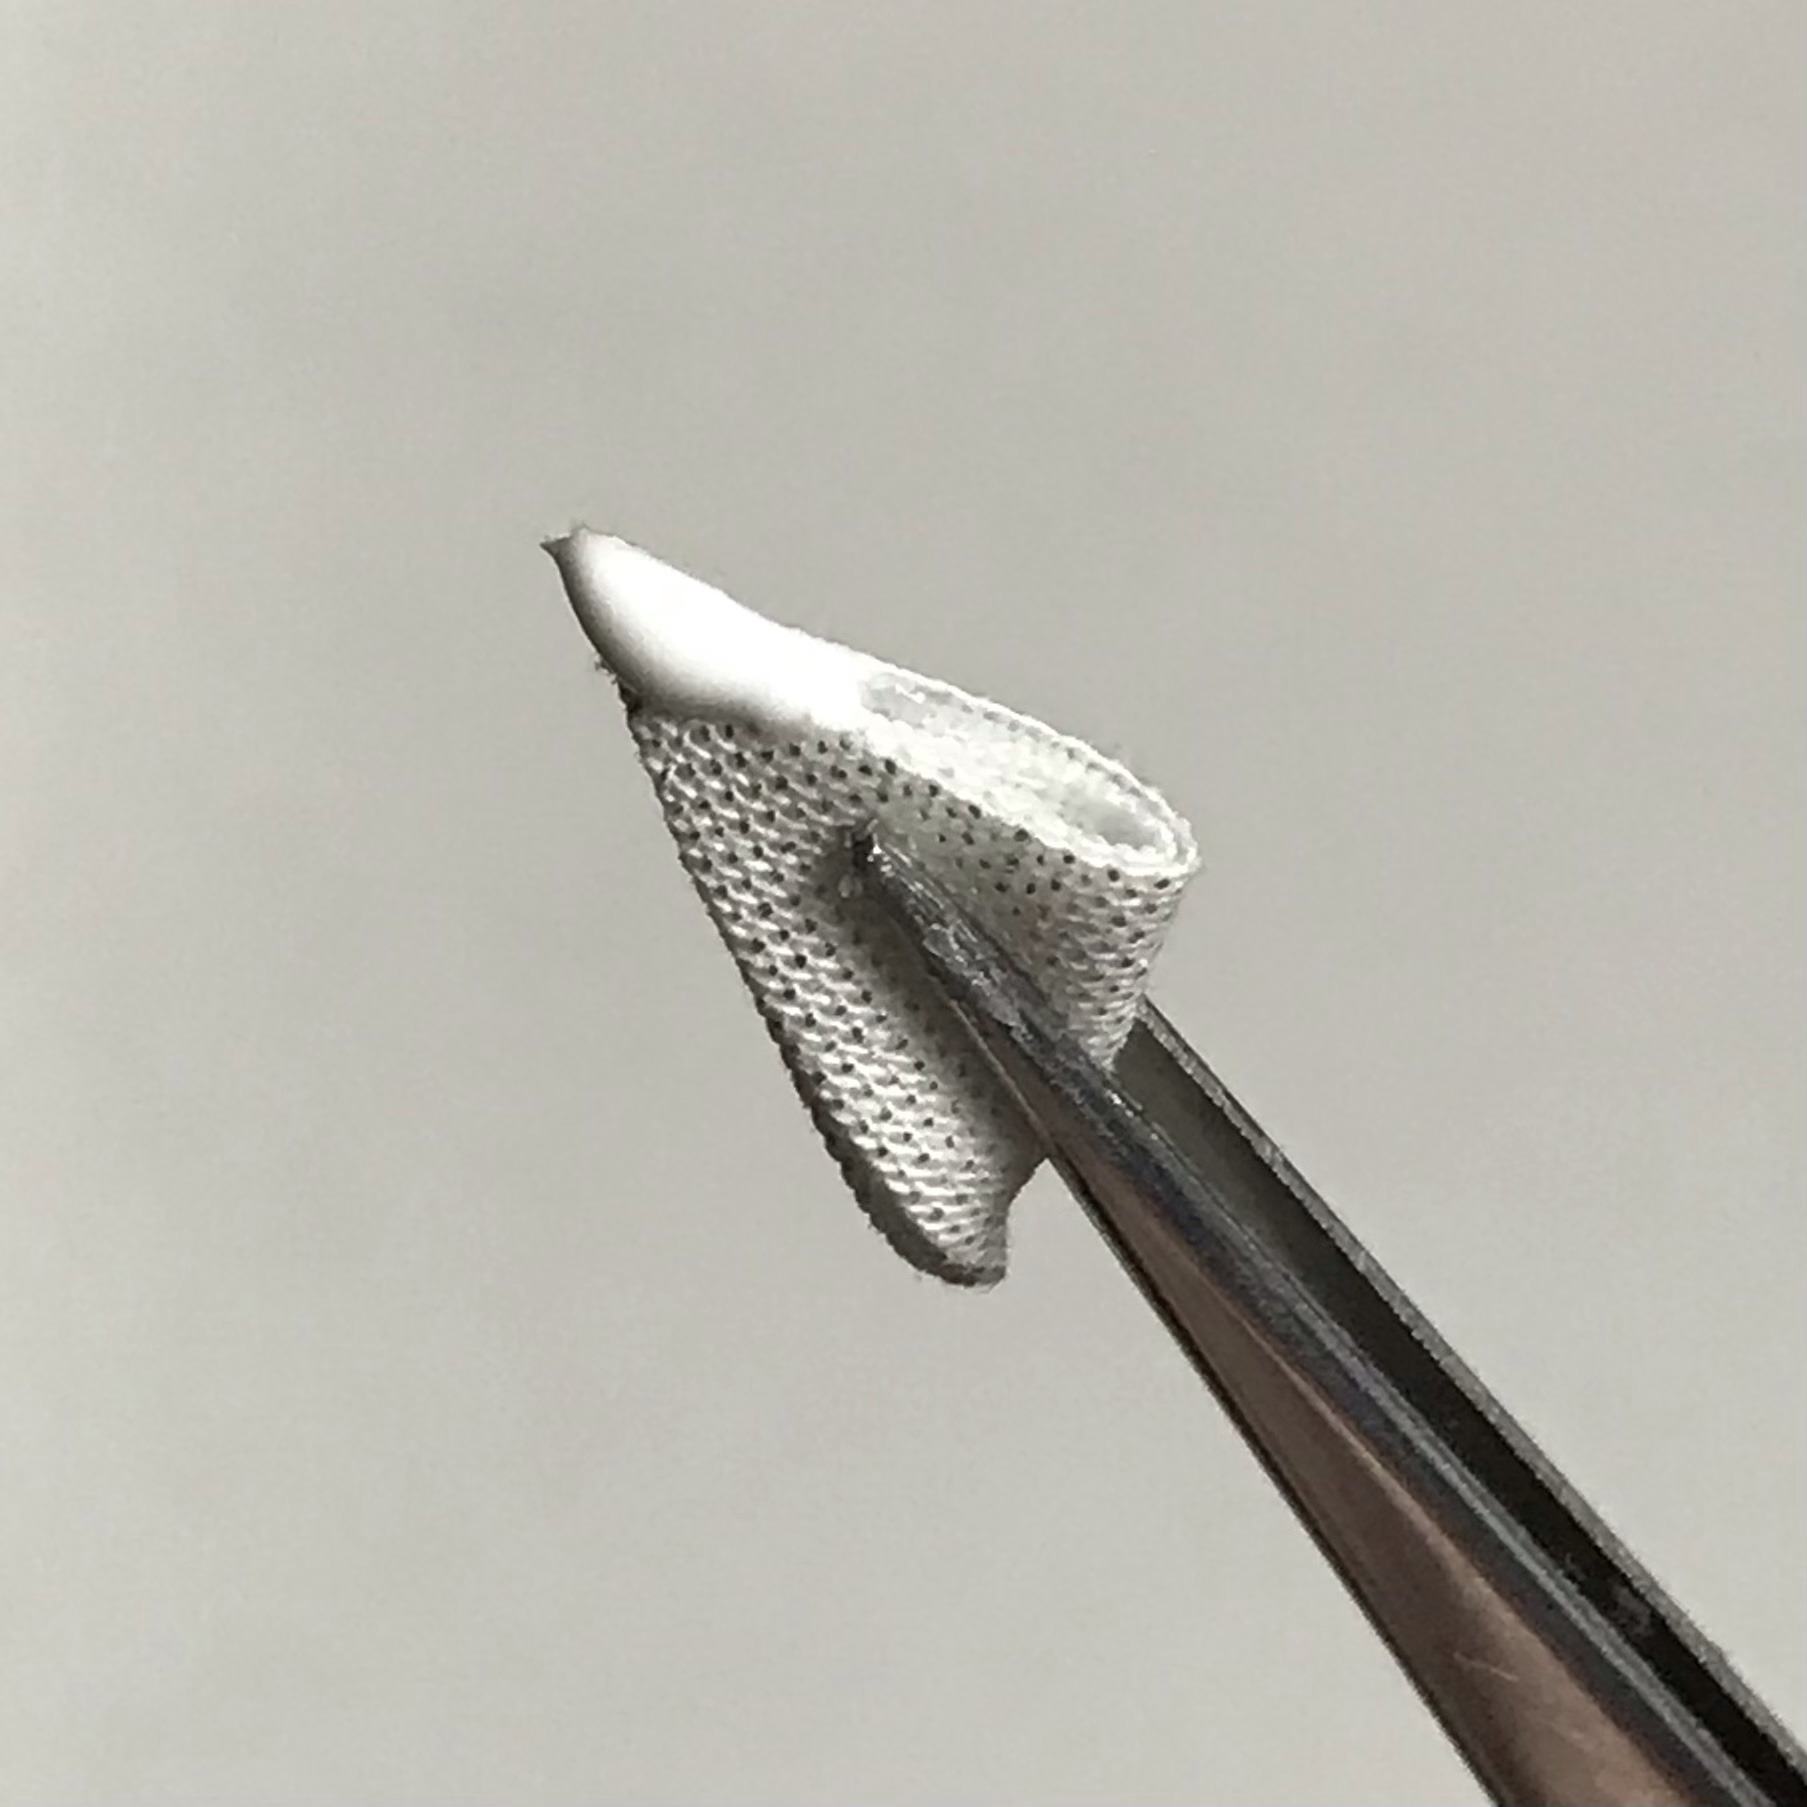
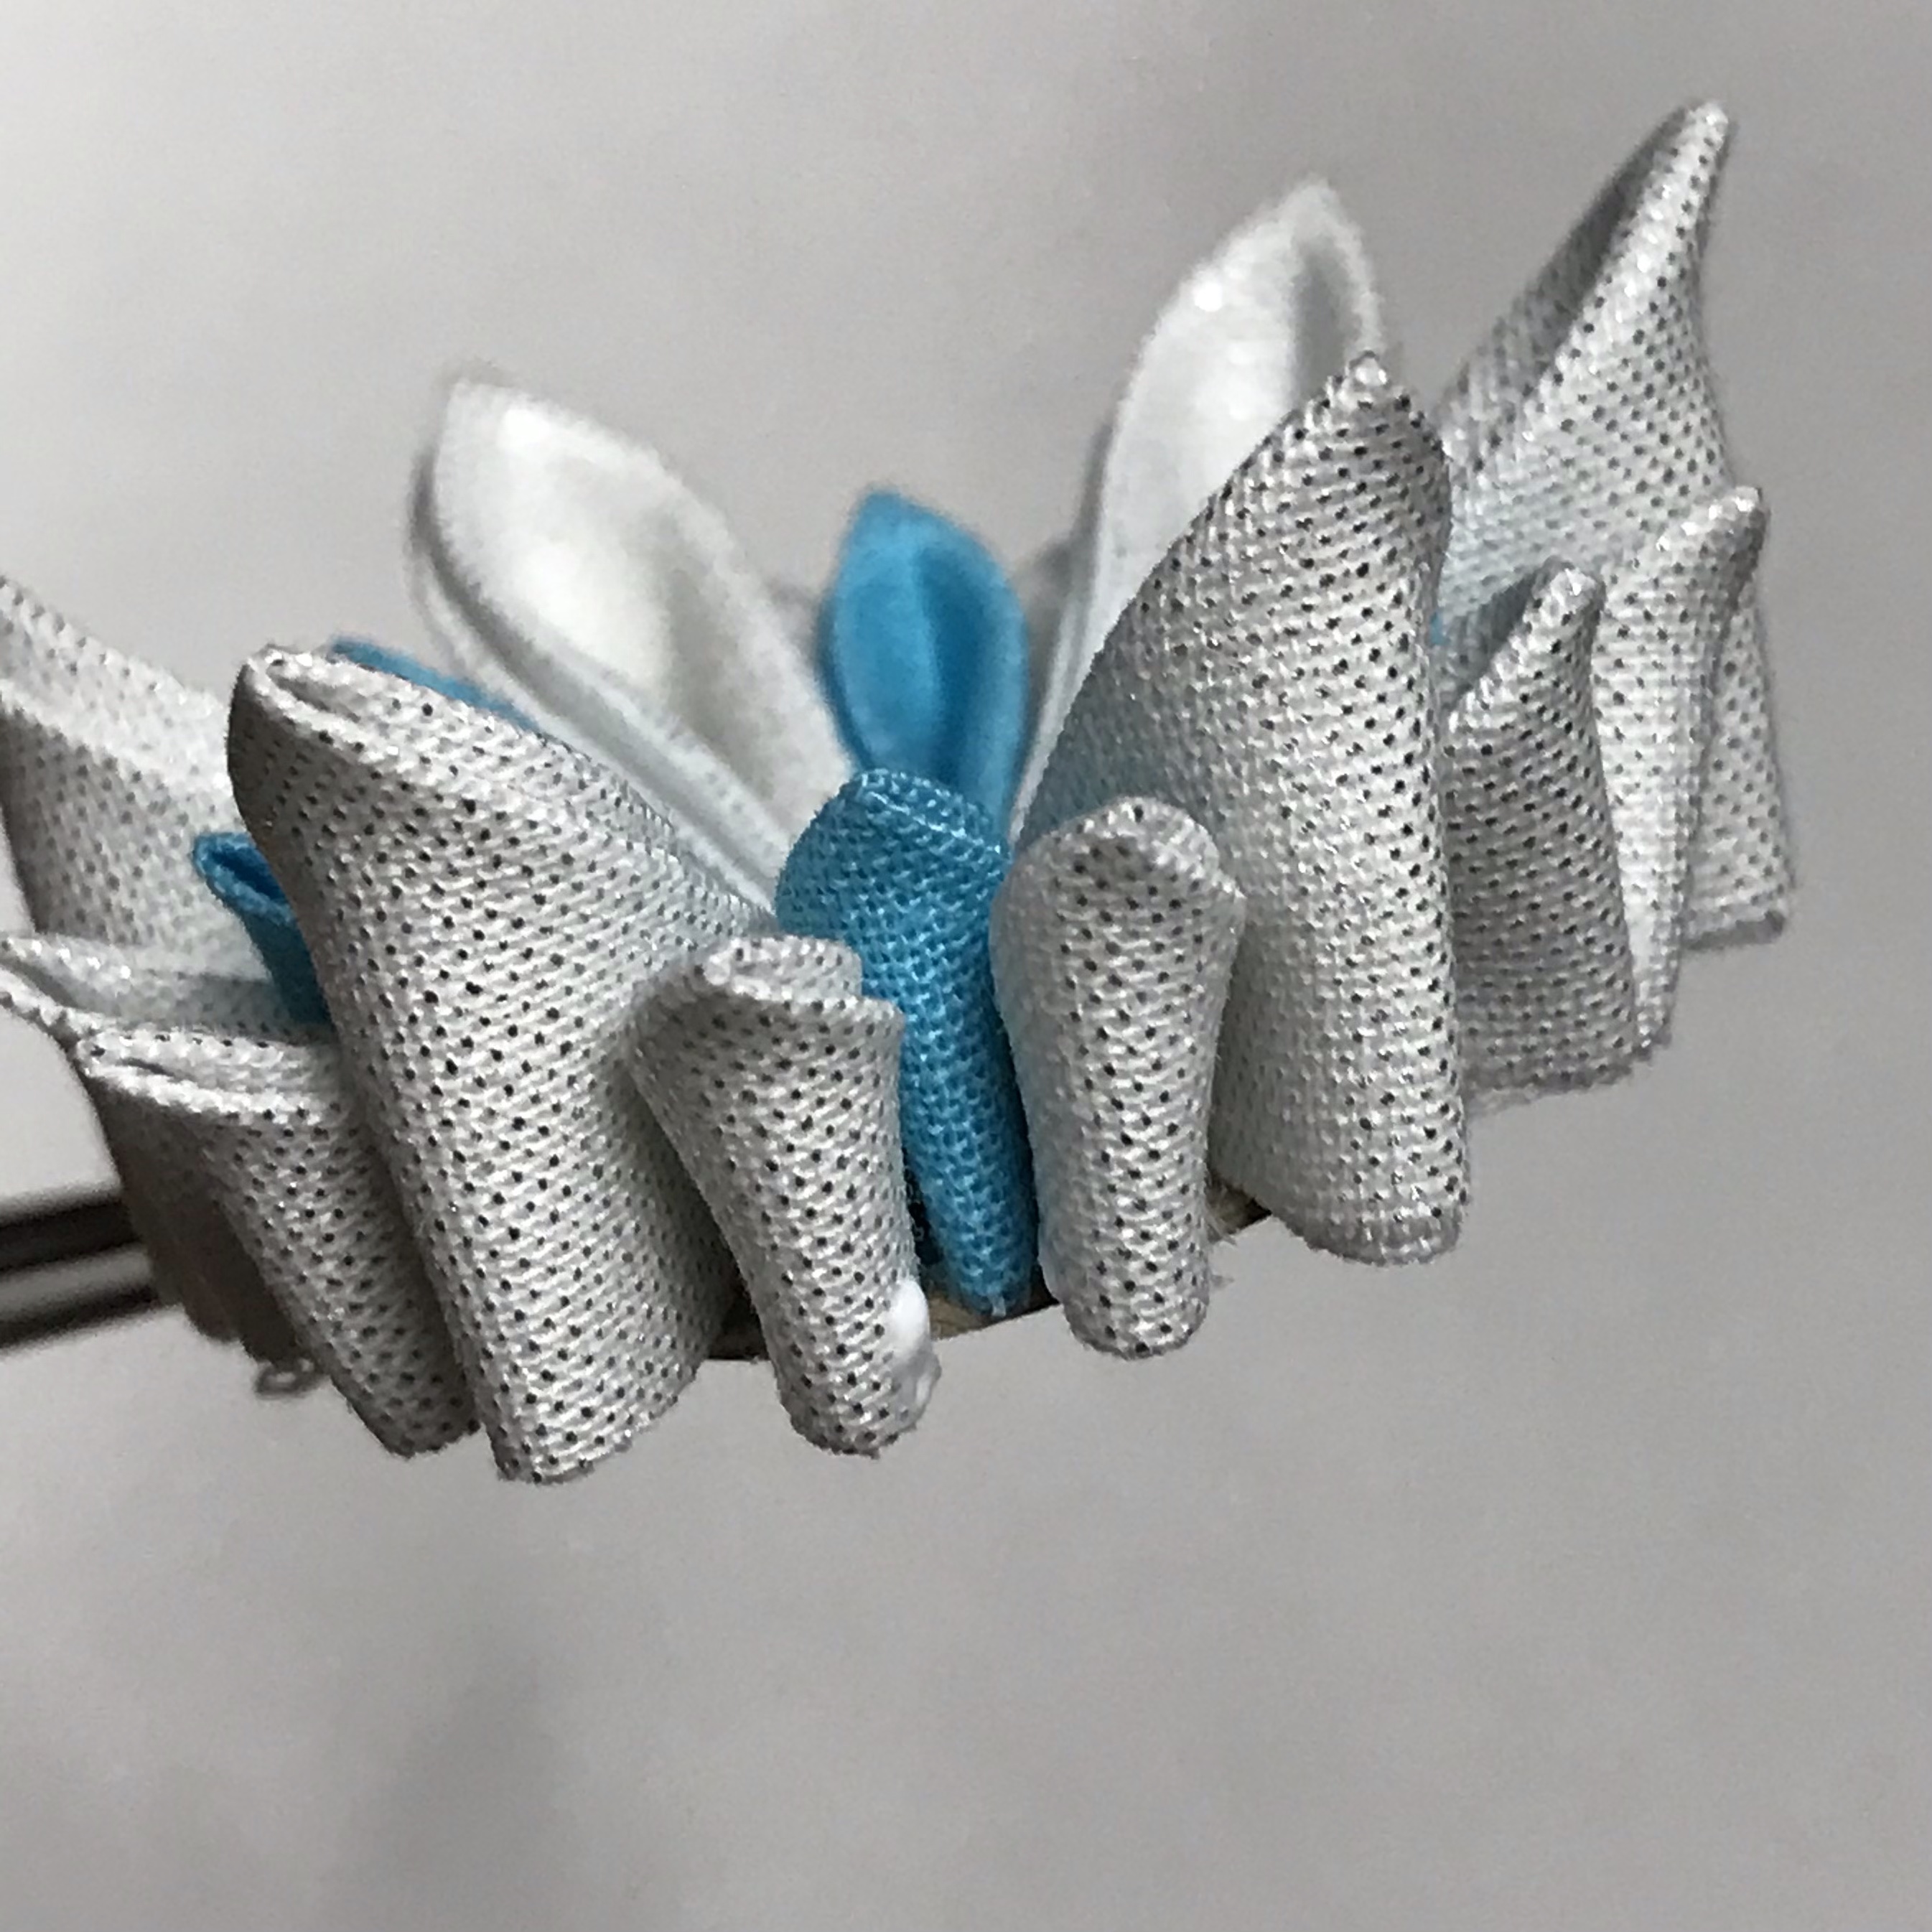
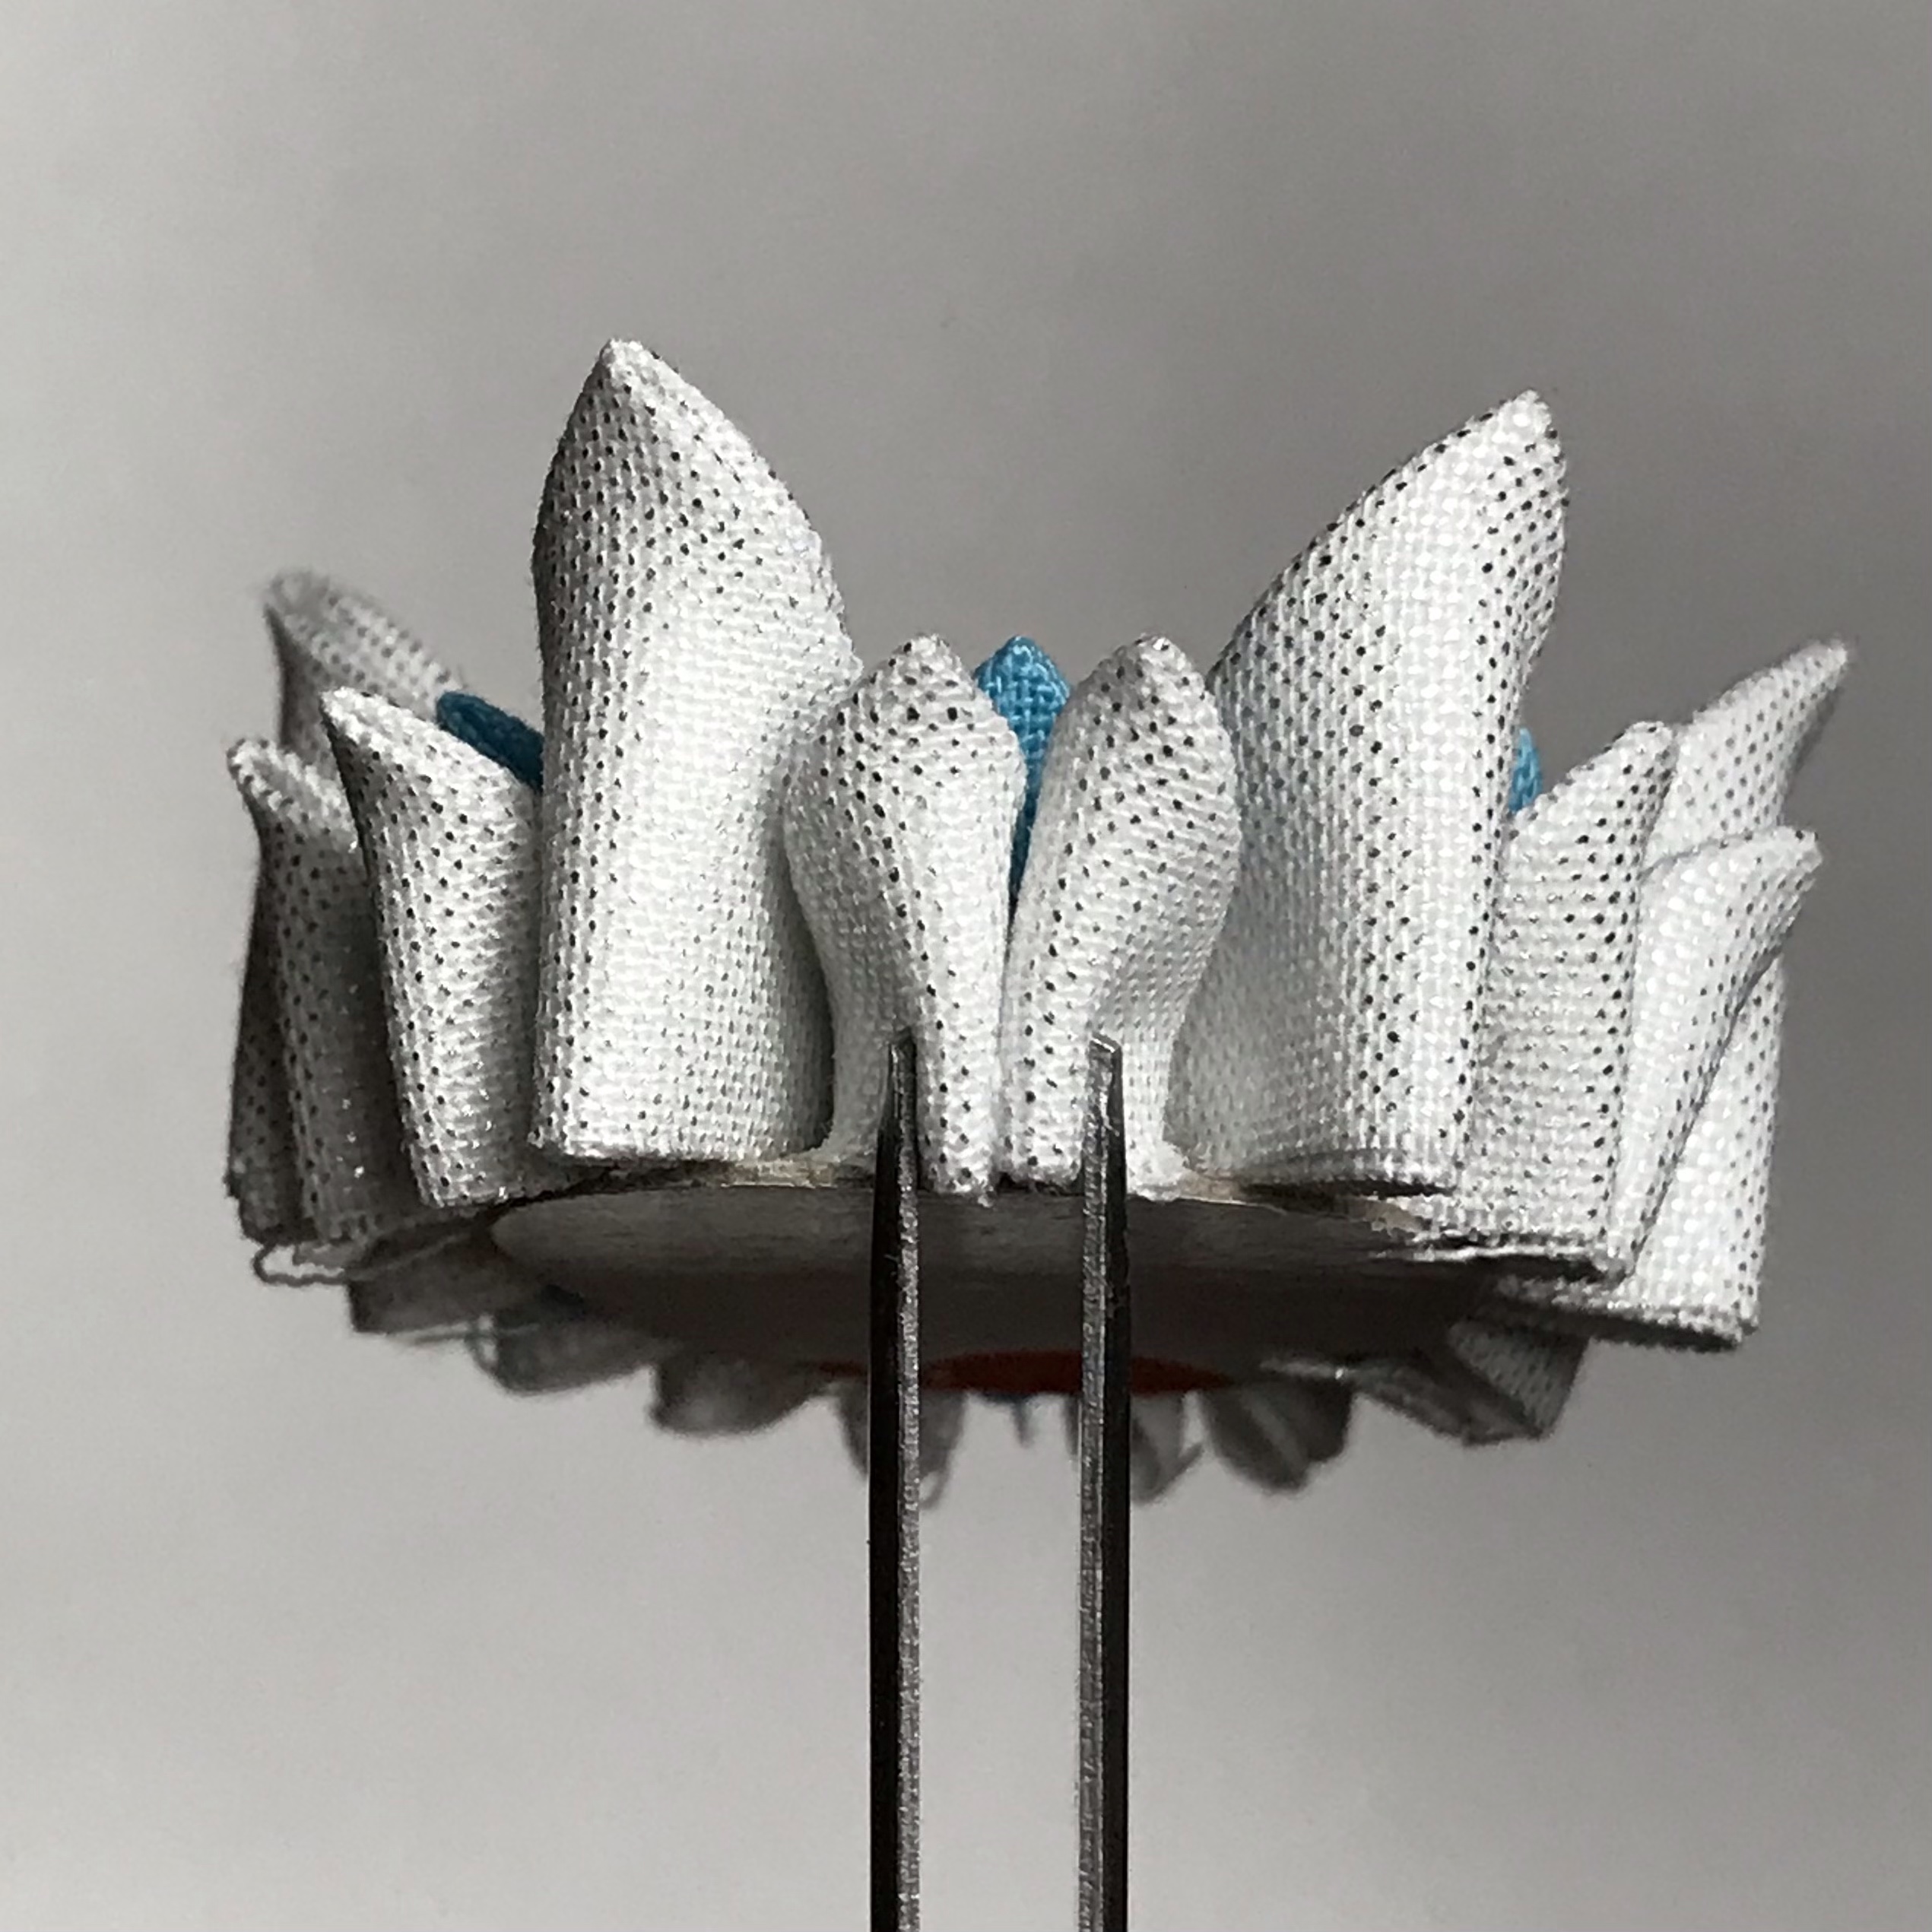
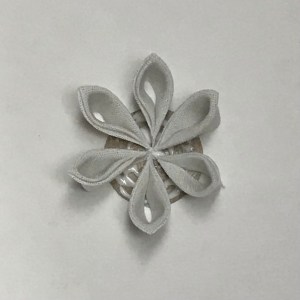
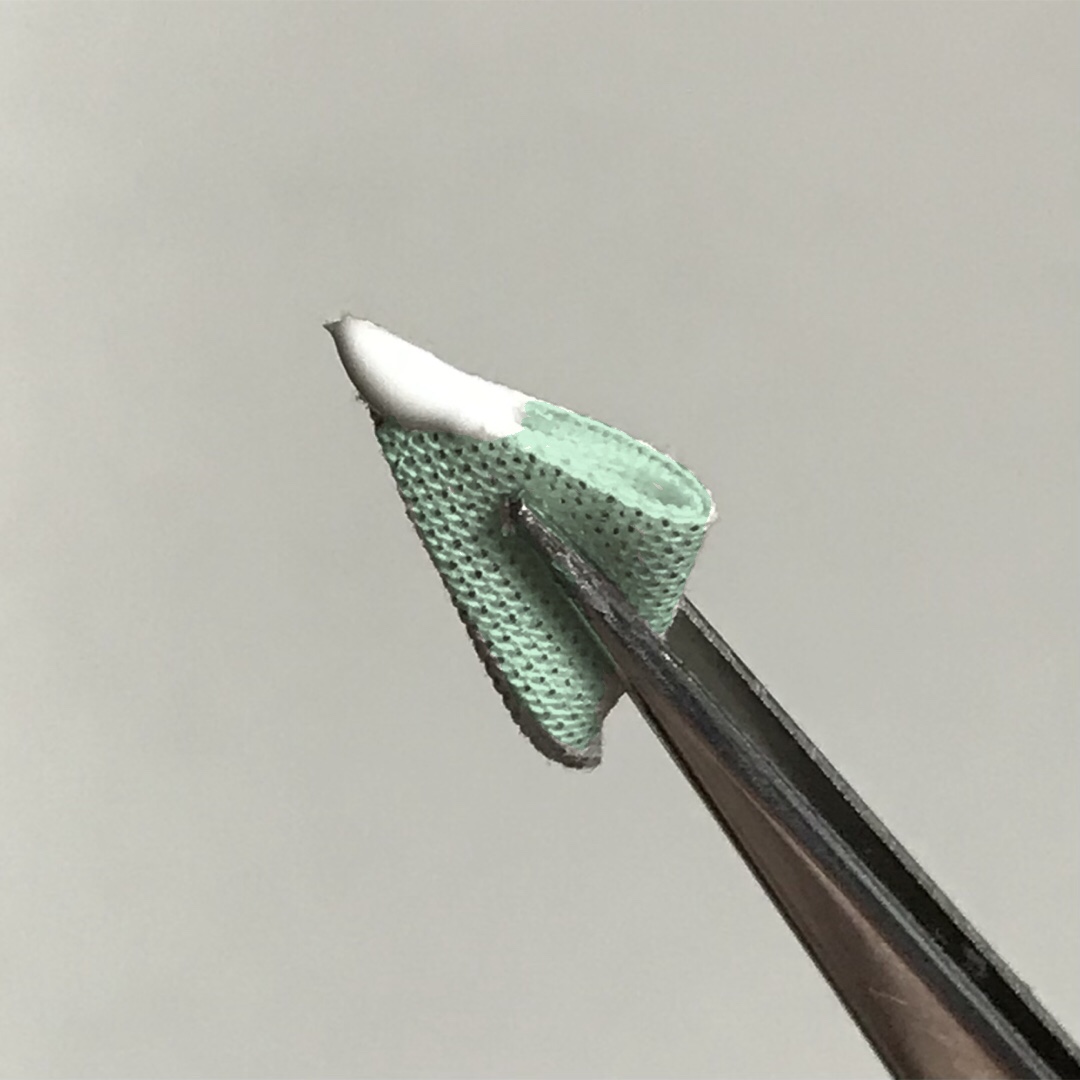
1. Make 6 white parts with (A), 12 green parts with (B), 6 blue parts with (C) and 6 white parts with (D) with the “Ken-tsumami” method.
2. Put glue on your 1 inch (2.5 cm) paper disc and place your (D) parts uniformly around the center.
(Hint: draw lines on your disc so you know where to place your petals.)

3. Before the glue gets completely dry, place your (C) parts between the (D) parts. You might need to put some glue on the bottom of (C) parts if the glue on your disc gets dry.
4. Reshape it before the glue dries. (Because they may move around in the wet glue.)
5. Put glue over half of the bottom of your (B) parts, and place them on your paper disc between each (C) and (D) parts.

6. Put a little glue between the bottom of the (B) parts you just glued, and put them together by squeezing them a little.
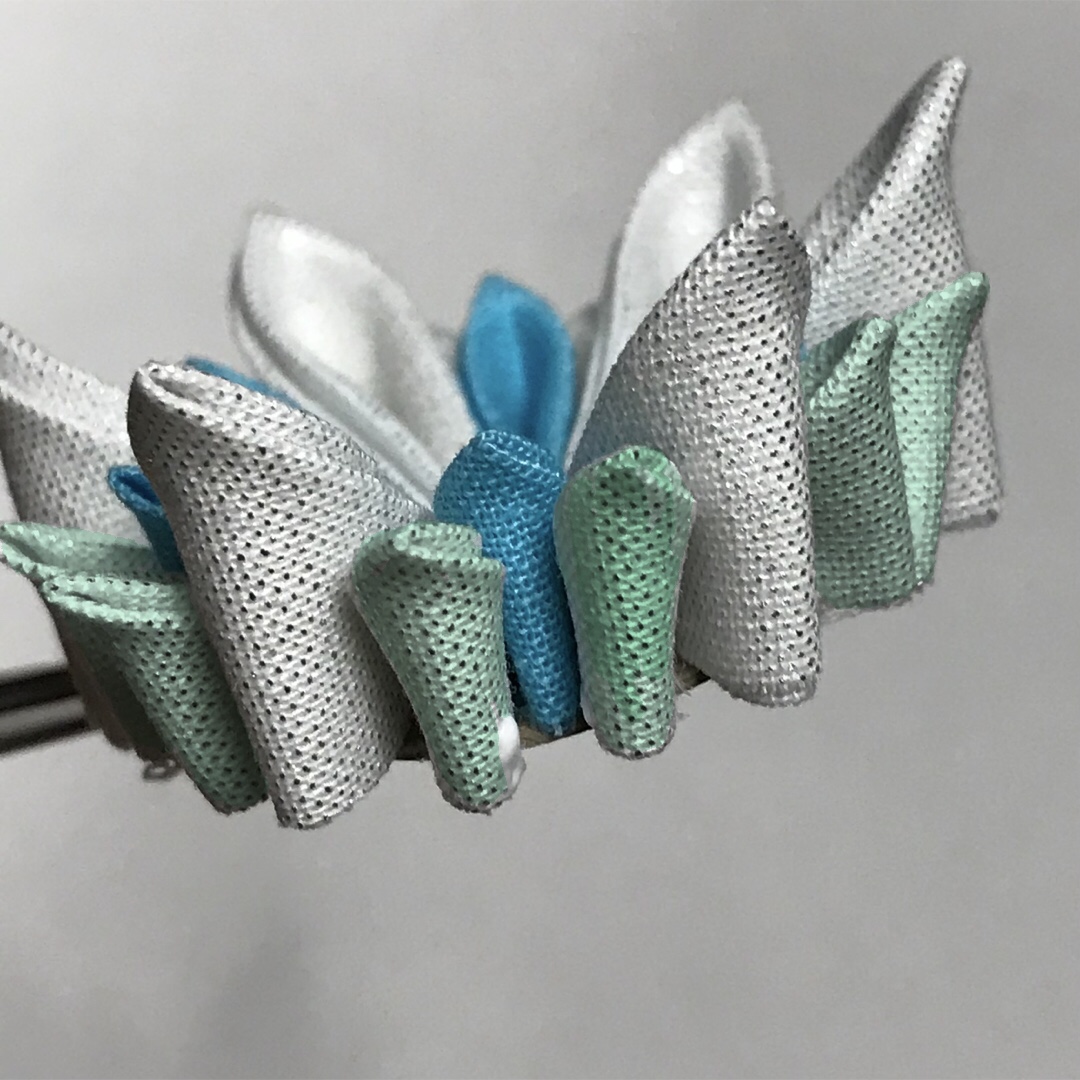

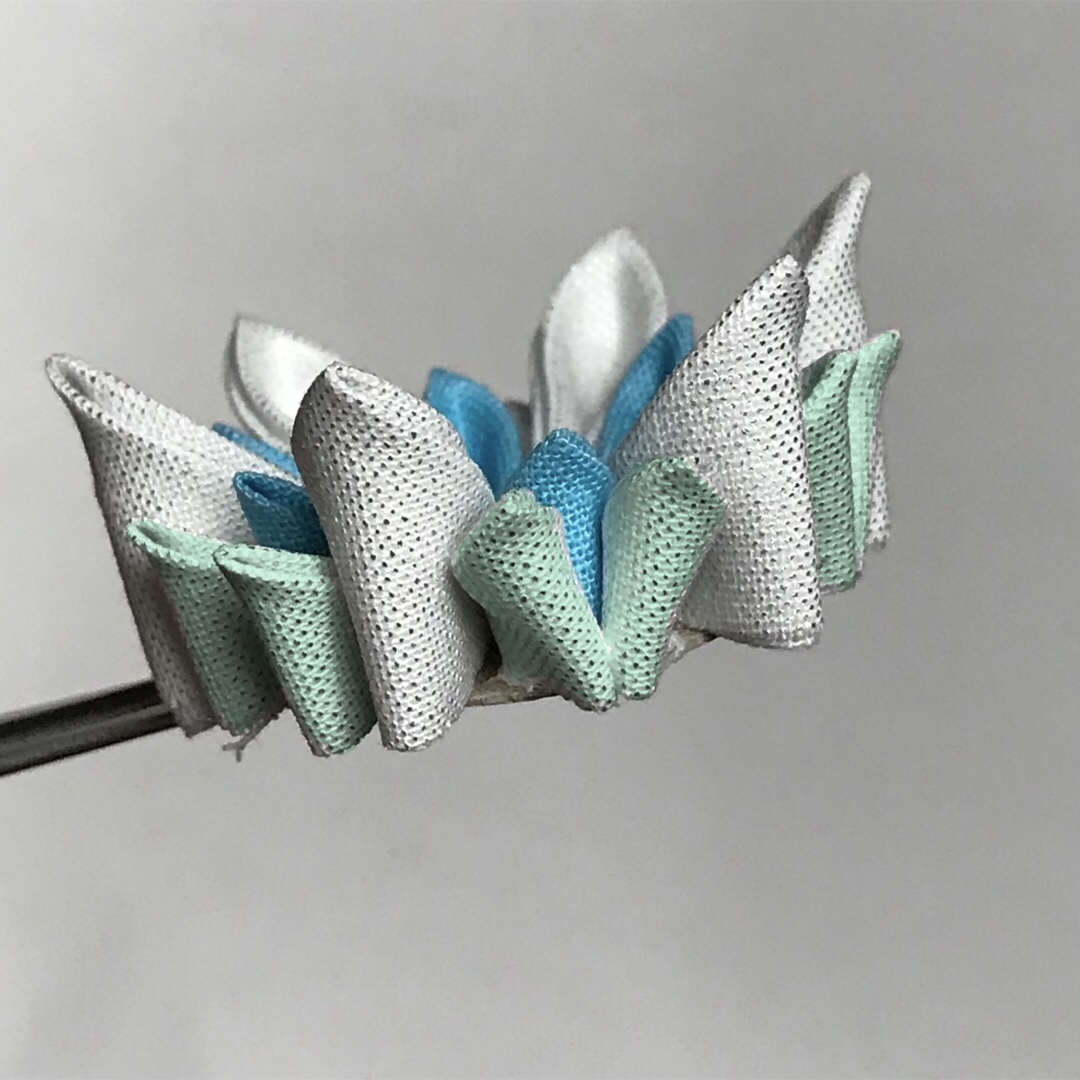
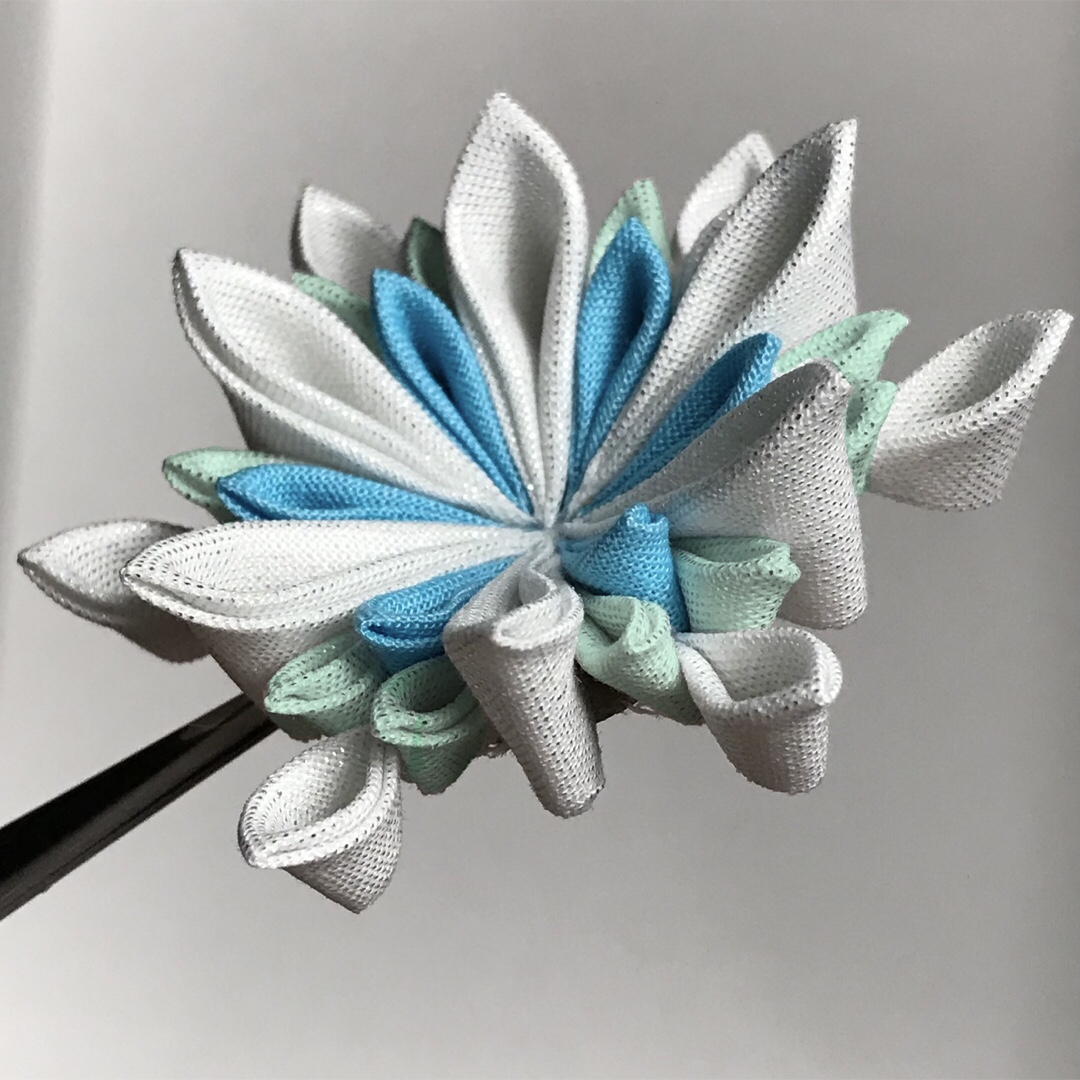
7. Put glue on 1/3 of the bottom on your (A) parts and place them between the (B) parts you just squeezed.
8. Make a board for the back side. Put glue on your 1.5 inch (3.8cm) paper disc and place it on the center of your 3 inch (7.5 cm) white cloth square with glue side down.
9. Cut off the corner of the cloth so it becomes round, put glue on the cloth, and wrap it around the paper disc.


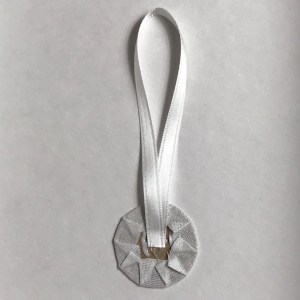
10. Fold your ribbon (or string) in half. Place its ends on the center of the board you just made and glue it.
11. Put more glue on the board to glue it on the back of your snowflake. You need to decide which side is up before you glue, so be careful!
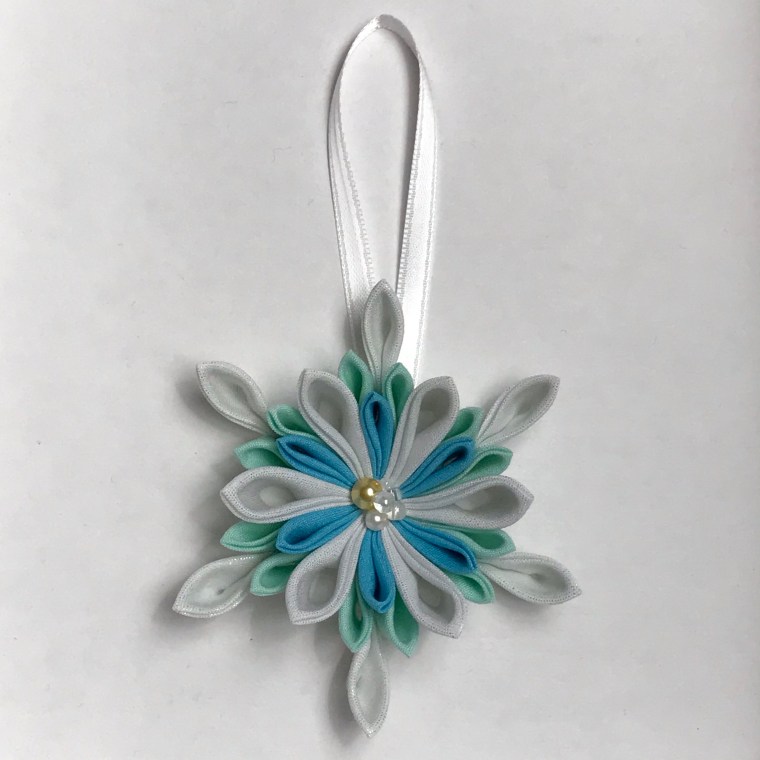
12. Finally, put glue on the center of your snowflake and place it on your decoration.
13. Congratulations!!! Done!
This time, I made a 3.5 inch (9cm) snowflake ornament, but if you change the sizes of clothes, you can make it bigger or smaller. You can also make it into a pin or a hair ornament by using a pin or a clip instead of a ribbon or string. Enjoy your creation!
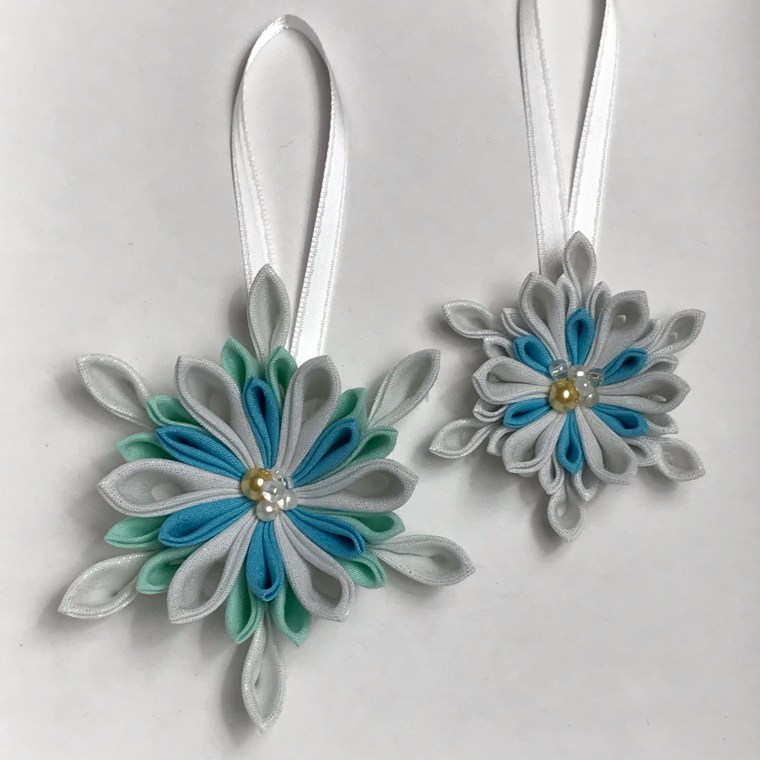
bigger snowflake: 3.5 inch (9 cm)
smaller snowflake: 2.5 inch (6 cm)